×
Create a new article
Write your page title here:
We currently have 71,040 articles on Fallout Wiki. Type your article name above or click on one of the titles below and start writing!


Fallout Wiki
71,040Articles

Difference between revisions of "Fallout: New Vegas message box transcriptions"

Tag: Reverted
 
(56 intermediate revisions by 2 users not shown)
Line 30: Line 30:
|-
|-
|style="text-align: center;" |'''[[Mojave Express dropbox]]'''<br /><br />vMojaveExpressTutorial<br />{{ID|0015F237}}
|style="text-align: center;" |'''[[Mojave Express dropbox]]'''<br /><br />vMojaveExpressTutorial<br />{{ID|0015F237}}
|
|[[File:FNVMojaveExpressTutorialMsg.jpeg|thumb|180px]]
|
|
{{transcript|text=
{{transcript|text=
Line 39: Line 39:
|{{linkable|}}
|{{linkable|}}
|-
|-
|style="text-align: center;" |'''[[Strange still]]'''<br /><br />NVDLC03BattleBrewStill<br />{{DLC ID|014961}}
|style="text-align: center;" |'''[[Strange still]]'''<br /><br />NVDLC03BattleBrewCraftMsg<br />{{DLC ID|01494A}}
|[[File:Strange still message box.jpg|thumb|180px]]
|[[File:Strange still message box.jpg|thumb|180px]]
|
|
Line 47: Line 47:
|{{linkable|}}
|{{linkable|}}
|-
|-
|style="text-align: center;" |'''[[Laser Detonator]]'''<br /><br />NVDLC04WeapSonicDetonator<br />{{DLC ID|007670}}
|style="text-align: center;" |'''[[Laser Detonator]]'''<br /><br />NVDLC04DetonatorMSG<br />{{DLC ID|00D878}}
|[[File:Laser detonator message box.jpg|thumb|180px]]
|[[File:Laser detonator message box.jpg|thumb|180px]]
|
|
Line 59: Line 59:


==Quests==
==Quests==
===Second Battle of Hoover Dam===
{|class="ace-table ace-table-full "


Line 68: Line 70:
|-
|-
|style="text-align: center;" |'''[[Mr. House/Mr. House (Fallout: New Vegas)|Mr. House]]'''<br /><br />VEndGameWarningMsgHouse<br />{{ID|00171DC4}}
|style="text-align: center;" |'''[[Mr. House/Mr. House (Fallout: New Vegas)|Mr. House]]'''<br /><br />VEndGameWarningMsgHouse<br />{{ID|00171DC4}}
|
|[[File:FNVVEndGameWarningMsgHouse.jpeg|thumb|180px]]
|
|
{{transcript|text=
{{transcript|text=
Line 112: Line 114:


==Locations==
==Locations==
===Goodsprings===
{|class="ace-table ace-table-full "
! style="width: 20%;" |Information
! style="width: 10%;" |Image
! style="width: 68%;" |Text
! style="width: 2%;"  |#
|-
|style="text-align: center;" |'''Goodsprings Radio'''<br />[[Prospector Saloon]]<br /><br />GSBrokenRadioMsg<br />{{ID|00109086}}
|[[File:FNV Mbox Prospectors Saloon Radio.jpg|180px]]
|
{{transcript|text=
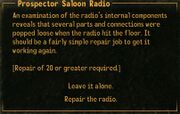
An examination of the radio's internal components reveals that several parts and connections were popped loose when the radio hit the floor. It should be a fairly simple repair job to get it working again.
[Repair of 20 or greater required.]
}}
|{{linkable|}}
|-
|style="text-align: center;" |'''Goodsprings Radio - Fixed'''<br />[[Prospector Saloon]]<br /><br />GSFixedRadioMsg<br />{{ID|00109088}}
|[[File:FNVGSRadioFixedMSG.jpg|180px]]
|
{{transcript|text=
You fixed the Prospector Saloon's radio.
}}
|{{linkable|}}
|-
|style="text-align: center;" |'''Broken SMG'''<br />[[Doc Mitchell's House]]<br /><br />GSBrokenSMGMsg<br />{{ID|00105233}}
|[[File:FNVGSBrokenSMGMSG.jpg|180px]]
|
{{transcript|text=
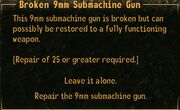
This 9mm submachine gun is broken but can possibly be restored to a fully functioning weapon.
[Repair of 25 or greater required.]
}}
|{{linkable|}}
|-
|style="text-align: center;" |'''[[Chemistry Set (Fallout: New Vegas)|Chemistry Set]]'''<br />[[Doc Mitchell's House]]<br /><br />GSChemistrySetMsg<br />{{ID|00105237}}
|[[File:FNVGSChemistrySetMSG.jpg|180px]]
|
{{transcript|text=
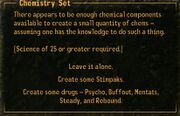
There appears to be enough chemical components available to create a small quantity of chems - assuming one has the knowledge to do such a thing.
[Science of 25 or greater required.]
}}
|{{linkable|}}
|}
===Unification Monument===
{|class="ace-table ace-table-full "
Line 176: Line 232:
|-
|-
|style="text-align: center;" |'''[[Underpass]]''' {{icon|unused}}<br /><br />UnderpassWaterActiveMsg<br />{{ID|00104687}} {{icon|unused}}
|style="text-align: center;" |'''[[Underpass]]''' {{icon|unused}}<br /><br />UnderpassWaterActiveMsg<br />{{ID|00104687}} {{icon|unused}}
|
|[[File:FNVUnderpassWaterActiveMsg.jpeg|thumb|180px]]
|
|
{{transcript|text=
{{transcript|text=
Line 196: Line 252:
|-
|-
|style="text-align: center;" |'''[[Black Mountain|Black Mountain Warning]]'''<br /><br /> BMWarningNoteMessage<br />{{ID|000E8541}}
|style="text-align: center;" |'''[[Black Mountain|Black Mountain Warning]]'''<br /><br /> BMWarningNoteMessage<br />{{ID|000E8541}}
|
|[[File:FNVBMWarningNoteMessage.jpeg|thumb|180px]]
|
|
{{transcript|text=
{{transcript|text=
Line 234: Line 290:
! style="width: 2%;"  |#
|-
|-
|style="text-align: center;" |'''[[HELIOS One]]'''<br />
|style="text-align: center;" |'''[[HELIOS One]]'''<br /><br />vHeliosPythonMessage<br />{{ID|000E3637}}
|[[File:vHeliosPythonMessage.jpg|200px]]
|
{{transcript|text=
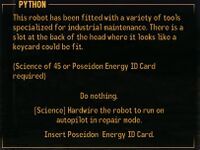
This robot has been fitted with a variety of tools specialized for industrial maintenance. There is a slot at the back of the head where it looks like a keycard could be fit.
 
(Science of 45 or Poseidon Energy ID Card required)
}}
|{{linkable|}}
|-
|style="text-align: center;" |'''[[HELIOS One]]'''<br /><br />vHeliosPythonMessageUseless<br />{{ID|000E4B5B}}
|[[File:FNV PYTHON Message pop box.jpg|200px]]
|[[File:FNV PYTHON Message pop box.jpg|200px]]
|
|
Line 242: Line 308:
}}
}}
<section end="heliosrobot" />
|{{linkable|}}
|-
|style="text-align: center;" |'''[[HELIOS One]]'''<br /><br />vHeliosAuxGeneratorMessage<br />{{ID|000E28CA}}
|[[File:vHeliosAuxGeneratorMessage.jpg|200px]]
|
{{transcript|text=
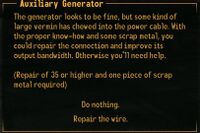
The generator looks to be fine, but some kind of large vermin has chewed into the power cable. With the proper know-how and some scrap metal, you could repair the connection and improve its output bandwidth. Otherwise you'll need help.
(Repair of 35 or higher and one piece of scrap metal required)
}}
|{{linkable|}}
|-
|style="text-align: center;" |'''[[HELIOS One]]'''<br /><br />vHeliosAuxGeneratorFixedMessage<br />{{ID|000E28CC}}
|[[File:vHeliosAuxGeneratorFixedMessage.jpg|200px]]
|
{{transcript|text=
You fixed the wiring. Sufficient electricity should now be flowing to the mainframe computer.
}}
|{{linkable|}}
|-
|style="text-align: center;" |'''[[HELIOS One]]'''<br /><br />vHeliosConsoleInactiveMessage<br />{{ID|000E42C7}}
|[[File:vHeliosConsoleInactiveMessage.jpg|200px]]
|
{{transcript|text=
The console is unresponsive. For it to operate properly, it would need to be activated during peak sunlight hours (9 AM - 3 PM), a power configuration would need to be set up in the tower's mainframe, and the two ground-level terminals would need to have an active uplink to the mainframe.
}}
|{{linkable|}}
|-
|style="text-align: center;" |'''[[HELIOS One]]'''<br /><br />vHeliosMainframeInactiveMessage<br />{{ID|000E28CB}}
|[[File:vHeliosMainframeInactiveMessage.jpg|200px]]
|
{{transcript|text=
This mainframe is currently unresponsive. The amount of power reaching the terminal seems to be insufficient.
}}
|{{linkable|}}
|{{linkable|}}
|}
|}
Line 254: Line 359:
|-
|-
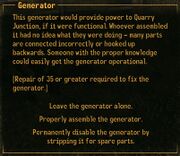
|style="text-align: center;" |'''Quarry Junction generator'''<br /><br />QJGeneratorActiveMsg<br />{{ID|0008D19C}}
|style="text-align: center;" |'''Quarry Junction generator'''<br /><br />QJGeneratorActiveMsg<br />{{ID|0008D19C}}
|
|[[File:FNVQJGeneratorActiveMsg.jpeg|thumb|180px]]
|
|
<section begin="QJgenerator" />
Line 272: Line 377:
! style="width: 2%;"  |#
|-
|-
|style="text-align: center;" |'''Nuclear warhead'''<br /><br />NVDLC04Warhead<br />{{DLC ID|007486}}
|style="text-align: center;" |'''Nuclear warhead'''<br /><br />NVDLC04WarheadMSG<br />{{DLC ID|0094EF}}
|
|
|
|
<section begin="Dividenukewarhead" />
{{transcript|text=
{{transcript|text=
Firing the laser detonator at any warhead will cause it to explode after about five seconds of continuous fire. Before it explodes, the warhead will glow and flames will shoot through the skin. The explosion will leave behind residual radiation like a mini nuke.
This is an intact nuclear warhead. If what Ulysses said is true, the Laser Detonator in Hopeville should be able to trigger these to explode.
}}
}}
<section end="Dividenukewarhead" />
Line 482: Line 587:
|-
|-
|style="text-align: center;" |'''Ammo'''<br /><br />HelpAmmo<br />{{ID|0000018C}}
|style="text-align: center;" |'''Ammo'''<br /><br />HelpAmmo<br />{{ID|0000018C}}
|
|[[File:FNVAmmoHelp1.jpg|thumb|180px]]<br />[[File:FNVAmmoHelp2.jpg|thumb|180px]]
|
|
{{transcript|text=
{{transcript|text=
Line 496: Line 601:


To switch ammo subtypes, equip them on this menu. Outside of the Pip-Boy, press 2 to cycle through ammo subtypes for your currently equipped weapon.
}}
|{{linkable|}}
|-
|style="text-align: center;" |'''Ammo (Xbox)'''<br /><br />HelpAmmoXbox<br />{{ID|0000018D}}
|[[File:HelpAmmoXbox1.jpg|thumb|180px]]<br />[[File:HelpAmmoXbox2.jpg|thumb|180px]]
|
{{transcript|text=
Ammunition is used by almost all Guns and Energy Weapons but is sometimes used by other weapon types. Basic ammo types have no special effects, but ammo subtypes may increase damage, reduce an enemy's Damage Threshold, or even decrease spread. Effects are listed on the ammo submenu when the ammo is highlighted. Most weapons can use any ammo subtype that starts with the same name as the base ammo. Common ammo subtypes include:
* Armor Piercing: Ignores a large portion of the enemy's Damage Threshold, does slightly more damage.
* Hollow Point: Does much more damage, but is easily blocked by armor.
* Over Charge: Used by Energy Weapons, increases damage but degrades the weapon more quickly.
* Slug: Used by shotguns, slugs replace buckshot with a single, large bullet that is more accurate.
To switch ammo subtypes, equip them on this menu. Outside of the Pip-Boy, press &sXBDPadUp; to cycle through ammo subtypes for your currently equipped weapon.
}}
}}
|{{linkable|}}
|{{linkable|}}
Line 510: Line 633:
|-
|-
|style="text-align: center;" |'''Apparel'''<br /><br />HelpApparel<br />{{ID|0000018B}}
|style="text-align: center;" |'''Apparel'''<br /><br />HelpApparel<br />{{ID|0000018B}}
|
|[[File:FNVApparelHelp1.jpg|thumb|180px]]<br />[[File:FNVApparelHelp2.jpg|thumb|180px]]
|
|
{{transcript|text=
{{transcript|text=
Line 522: Line 645:


* Repair: This option opens the Repair submenu, which allows apparel to be repaired by salvaging parts from similar items.
}}
|{{linkable|}}
|}
===Barter===
{|class="ace-table ace-table-full "
! style="width: 20%;" |Information
! style="width: 10%;" |Image
! style="width: 68%;" |Text
! style="width: 2%;"  |#
|-
|style="text-align: center;" |'''Barter'''<br /><br />HelpBarter<br />{{ID|0000017F}}
|[[File:FNVBarterHelp1.jpg|thumb|180px]]<br />[[File:FNVBarterHelp2.jpg|thumb|180px]]
|
{{transcript|text=
The Barter screen allows you to trade, buy or sell items. The types of items that can be traded, bought, or sold depend on the person you're trading with. The prices you get for buying or selling depend on your Barter skill.
To Barter, simply select an item and move it from your inventory into the other person's (if you want to sell or trade one of your own items) or from the other person's inventory into your own (if you want to buy or trade for one of their items).
As items are moved back and forth, caps will also be automatically moved between both parties. This is represented by the large "caps" arrow in the middle.
If the arrow is darkened, it means one of you doesn't have enough caps to complete the transaction. You cannot accept the barter if you don't have enough caps. But you can accept it if the other person doesn't have enough, but at this point, you are giving items away for free.
}}
}}
|{{linkable|}}
|{{linkable|}}
Line 536: Line 683:
|-
|-
|style="text-align: center;" |'''Starting Caravans'''<br /><br />HelpCaravanStarting Caravans<br />{{ID|00000188}}
|style="text-align: center;" |'''Starting Caravans'''<br /><br />HelpCaravanStarting Caravans<br />{{ID|00000188}}
|
|[[File:FNVCaravanStartingCaravansHelp.jpg|thumb|180px]]
|
|
{{transcript|text=
{{transcript|text=
Line 547: Line 694:
|-
|-
|style="text-align: center;" |'''Deck Building'''<br /><br />HelpCaravanDeckBuilding<br />{{ID|00000187}}
|style="text-align: center;" |'''Deck Building'''<br /><br />HelpCaravanDeckBuilding<br />{{ID|00000187}}
|
|[[File:FNVCaravanDeckBuildingHelp.jpg|thumb|180px]]
|
|
{{transcript|text=
{{transcript|text=
Line 558: Line 705:
|-
|-
|style="text-align: center;" |'''Contract War'''<br /><br />HelpCaravanContractWar<br />{{ID|00000189}}
|style="text-align: center;" |'''Contract War'''<br /><br />HelpCaravanContractWar<br />{{ID|00000189}}
|
|[[File:FNVCaravanContractWarHelp.jpg|thumb|180px]]<br /><br />[[File:FNVCaravanContractWarHelp2.jpg|thumb|180px]]<br /><br />[[File:FNVCaravanContractWarHelp3.jpg|thumb|180px]]<br /><br />[[File:FNVCaravanContractWarHelp4.jpg|thumb|180px]]<br /><br />[[File:FNVCaravanContractWarHelp5.jpg|thumb|180px]]
|
|
{{transcript|text=
{{transcript|text=
Line 586: Line 733:
|-
|-
|style="text-align: center;" |'''Betting'''<br /><br />HelpCaravanBetting<br />{{ID|00000186}}
|style="text-align: center;" |'''Betting'''<br /><br />HelpCaravanBetting<br />{{ID|00000186}}
|
|[[File:FNVCaravanBettingHelp.jpg|thumb|180px]]
|
|
{{transcript|text=
{{transcript|text=
Line 604: Line 751:
|-
|-
|style="text-align: center;" |'''Compass'''<br /><br />HelpCompass<br />{{ID|00072346}}
|style="text-align: center;" |'''Compass'''<br /><br />HelpCompass<br />{{ID|00072346}}
|
|[[File:FNVCompassHelp.jpg|thumb|180px]]
|
|
{{transcript|text=
{{transcript|text=
Line 628: Line 775:
|-
|-
|style="text-align: center;" |'''Crime'''<br /><br />HelpCrime<br />{{ID|0007234D}}
|style="text-align: center;" |'''Crime'''<br /><br />HelpCrime<br />{{ID|0007234D}}
|
|[[File:FNVCrimeHelp1.jpg|thumb|180px]]<br /><br />[[File:FNVCrimeHelp2.jpg|thumb|180px]]
|
|
{{transcript|text=
{{transcript|text=
Line 646: Line 793:


If a fight starts that you did not intend, you can attempt to yield by holstering your weapon. This may or may not be successful depending on how the attacker feels about you.
}}
|{{linkable|}}
|}
===Crippling===
{|class="ace-table ace-table-full "
! style="width: 20%;" |Information
! style="width: 10%;" |Image
! style="width: 68%;" |Text
! style="width: 2%;"  |#
|-
|style="text-align: center;" |'''Crippling'''<br /><br />HelpCrippling<br />{{ID|000BE8D4}}
|[[File:FNVCripplingHelp1.jpg|thumb|180px]]<br />[[File:FNVCripplingHelp2.jpg|thumb|180px]]
|
{{transcript|text=
The effects of being crippled depend on the limb. These effects apply to you as well as to your enemies.
* Head: Reduced perception, concussion effect.
* Arms: Reduced aiming ability. Enemies will be disarmed at the moment their arm is crippled.
* Chest: Higher chance to be staggered when taking damage.
* Legs: Reduced run speed. Enemies cannot perform leaping or charging attacks.
Some enemies have Antennae or a Combat Inhibitor. Crippling that will cause them to frenzy, attacking anything near them.
}}
|{{linkable|}}
|}
===Dialogue===
{|class="ace-table ace-table-full "
! style="width: 20%;" |Information
! style="width: 10%;" |Image
! style="width: 68%;" |Text
! style="width: 2%;"  |#
|-
|style="text-align: center;" |'''Dialogue'''<br /><br />HelpDialogue<br />{{ID|00000179}}
|[[File:FNVDialogueHelp1.jpg|thumb|180px]]<br />[[File:FNVDialogueHelp2.jpg|thumb|180px]]
|
{{transcript|text=
When in dialogue with a character, simply select the response that seems most appropriate to the situation... and be prepared for the character you're talking with to react accordingly.
Occasionally, you will be presented with a Speech Challenge. A Speech Challenge is a response preceded by the word "Speech" and the percentage chance of success; the higher your Speech skill, the greater the chance of success.
Succeed in a Speech Challenge, and you'll achieve the results indicated by the response. Fail a Speech Challenge, and future Speech Challenges with that character will be lowered.
You may also be presented with responses preceded by a certain Attribute or Skill, like [Strength] or [Science]. These responses are only visible if you have the minimum required value in the Attribute or Skill. So, there is never a percentage associated with these responses, because there is no way to "fail" them -- selecting a special Attribute or Skill response is always to your benefit.
}}
|{{linkable|}}
|}
===Drugs and Addiction===
{|class="ace-table ace-table-full "
! style="width: 20%;" |Information
! style="width: 10%;" |Image
! style="width: 68%;" |Text
! style="width: 2%;"  |#
|-
|style="text-align: center;" |'''Drugs and Addiction'''<br /><br />HelpDrugs<br />{{ID|00072357}}
|[[File:FNVDrugsAddictionHelp.jpg|thumb|180px]]
|
{{transcript|text=
Each time you take a chem or drink alcohol, your chance of becoming addicted to it goes up. If you stop using the drug for a while, this chance will drop. Each drug has its own addiction chance, so using one type will not increase your chance of becoming addicted to another.
Addiction will hurt some of your S.P.E.C.I.A.L. attributes. These penalties go away temporarily if you take that drug again. A doctor can cure you of any addiction, for a price.
You cannot become addicted to Stimpaks, Rad-X or RadAway.
}}
|{{linkable|}}
|}
===Faction Armor===
{|class="ace-table ace-table-full "
! style="width: 20%;" |Information
! style="width: 10%;" |Image
! style="width: 68%;" |Text
! style="width: 2%;"  |#
|-
|style="text-align: center;" |'''Faction Armor'''<br /><br />VFactionOutfitTutorial<br />{{ID|0016223B}}
|[[File:FNVFactionArmorHelp.jpg|thumb|180px]]
|
{{transcript|text=
You have equipped faction armor! Faction armor disguises you as a member of that faction. Members of that faction now consider you a friend, while enemies of that faction will attack you on sight regardless of your personal faction relation with them. Any reputation changes that occur while wearing faction armor still affect your character.
Security personnel such as guards and watchdogs will see through your disguise and alert anyone nearby, so watch out!
}}
}}
|{{linkable|}}
|{{linkable|}}
Line 660: Line 901:
|-
|-
|style="text-align: center;" |'''[[Slot machine|Slots]]'''<br /><br />HelpSlots<br />{{ID|00172096}}
|style="text-align: center;" |'''[[Slot machine|Slots]]'''<br /><br />HelpSlots<br />{{ID|00172096}}
|
|[[File:FNVSlotsHelp.jpg|thumb|180px]]
|
|
{{transcript|text=
{{transcript|text=
Line 671: Line 912:
|-
|-
|style="text-align: center;" |'''[[Roulette]]'''<br /><br />HelpRoulette<br />{{ID|00172095}}
|style="text-align: center;" |'''[[Roulette]]'''<br /><br />HelpRoulette<br />{{ID|00172095}}
|
|[[File:FNVRouletteHelp1.jpg|thumb|180px]]<br /><br />[[File:FNVRouletteHelp2.jpg|thumb|180px]]<br /><br />[[File:FNVRouletteHelp3.jpg|thumb|180px]]
|
|
{{transcript|text=
{{transcript|text=
Line 696: Line 937:
|-
|-
|style="text-align: center;" |'''[[Blackjack]]'''<br /><br />HelpBlackjack<br />{{ID|00172094}}
|style="text-align: center;" |'''[[Blackjack]]'''<br /><br />HelpBlackjack<br />{{ID|00172094}}
|
|[[File:FNVBlackjackHelp1.jpg|thumb|180px]]<br /><br />[[File:FNVBlackjackHelp2.jpg|thumb|180px]]<br /><br />[[File:FNVBlackjackHelp3.jpg|thumb|180px]]<br /><br />[[File:FNVBlackjack4.jpg|thumb|180px]]
|
|
{{transcript|text=
{{transcript|text=
Line 716: Line 957:


Individual casinos use different numbers of card decks, pay out natural blackjack hands at different odds, and shuffle their decks with varying frequency. Pay close attention to these details to develop advanced playing strategies.
}}
|{{linkable|}}
|}
===Glossary===
{|class="ace-table ace-table-full "
! style="width: 20%;" |Information
! style="width: 10%;" |Image
! style="width: 68%;" |Text
! style="width: 2%;"  |#
|-
|style="text-align: center;" |'''Glossary'''<br /><br />HelpGlossary<br />{{ID|00072357}}
|[[File:FNVGlossary1.jpg|thumb|180px]]<br />[[File:FNVGlossary2.jpeg|thumb|180px]]
|
{{transcript|text=
* AG: Agility
* AP: Action Points
* Caps: Bottlecaps
* CH: Charisma
* CND: Condition
* DR: Damage Resistance
* EFF: Effects
* EN: Endurance
* HP: Hit Points
* HR: Healing Rate
* IN: Intelligence
* LU: Luck
* LVL: Level
* PE: Perception
* RAD: Radiation
* RADS: Your Accumulated Radiation
* Rad Poison: Radiation Poisoning
* Rad Resist: Radiation Resistance
* ST: Strength
* VAL: Value
* WG: Weight
* XP: Experience Points
}}
|{{linkable|}}
|}
===Hacking===
{|class="ace-table ace-table-full "
! style="width: 20%;" |Information
! style="width: 10%;" |Image
! style="width: 68%;" |Text
! style="width: 2%;"  |#
|-
|style="text-align: center;" |'''[[Hacking (Fallout: New Vegas)|Hacking]]'''<br /><br />HelpHacking<br />{{ID|0000017B}}
|[[File:FNVHackingHelp.jpg|thumb|180px]]
|
{{transcript|text=
Some terminals are protected, and can't be accessed without a password. If your Science skill is high enough, you can attempt to hack the terminal.
Selecting the correct password will grant you access. If your guess is incorrect, you will be shown how many letters match the correct password, and in the correct location.
You have 4 tries to guess correctly. If you fail, the terminal will remain inaccessible until you own the password. You can exit hacking at any time and try again. However, exiting the terminal will force its security to reset, delaying your ability to start hacking again.
}}
}}
|{{linkable|}}
|{{linkable|}}
Line 741: Line 1,043:
|-
|-
|style="text-align: center;" |'''[[Hardcore Mode]]'''<br /><br />HelpHardcoreNeeds<br />{{ID|00000190}}
|style="text-align: center;" |'''[[Hardcore Mode]]'''<br /><br />HelpHardcoreNeeds<br />{{ID|00000190}}
|
|[[File:FNVHCNeeds1.jpg|thumb|180px]]<br /><br />[[File:FNVHCNeeds2.jpg|thumb|180px]]
|
|
{{transcript|text=
{{transcript|text=
Line 753: Line 1,055:


* Sleep Deprivation (SLP) - Sleep deprivation is the most low-maintenance of the basic needs. Though a few chems and drinks can help offset sleep deprivation, nothing beats sleep itself.
}}
|{{linkable|}}
|}
===Healing===
{|class="ace-table ace-table-full "
! style="width: 20%;" |Information
! style="width: 10%;" |Image
! style="width: 68%;" |Text
! style="width: 2%;"  |#
|-
|style="text-align: center;" |'''Healing'''<br /><br />HelpPipBoyStats<br />{{ID|00000181}}
|[[File:FNVHealingHelp.jpg|thumb|180px]]
|
{{transcript|text=
When you are hurt, there are several ways to restore your health:
* Visit a doctor and pay for healing.
* Use a Stimpak.
* Eat food or drink water.
* Sleep in a bed.
}}
|{{linkable|}}
|-
|style="text-align: center;" |'''Healing Limbs'''<br /><br />HelpHealingLimbs<br />{{ID|00072358}}
|[[File:FNVHealingLimbsHelp2.jpg|thumb|180px]]
|
{{transcript|text=
<div>
In order to heal a crippled limb, you have three choices: sleep in a bed, find a doctor, or use a Stimpak to heal yourself. In Hardcore Mode, you may only heal crippled limbs by using Doctor's Bags or by visiting a doctor for medical care.
<p>
Stimpaks can be used for general healing (which will also slightly heal crippling damage), or they can be applied directly to a limb to heal crippling damage.
<p>
To heal a crippled limb directly using a Stimpak, navigate to the Stats screen in your Pip-Boy, then left-click on a limb to use a Stimpak on that limb.
}}
|{{linkable|}}
|-
|style="text-align: center;" |'''Healing Limbs (Xbox)'''<br /><br />HelpHealingLimbsXBox<br />{{ID|00072359}}
|[[File:HelpHealingLimbsXbox1.jpg|thumb|180px]]<br />[[File:HelpHealingLimbsXbox1.jpg|thumb|180px]]
|
{{transcript|text=
<div>
In order to heal a crippled limb, you have three choices: sleep in a bed, find a doctor, or use a Stimpak to heal yourself. In Hardcore Mode, you may only heal crippled limbs by using Doctor's Bags or by visiting a doctor for medical care.
<p>
Stimpaks can be used for general healing (which will also slightly heal crippling damage), or they can be applied directly to a limb to heal crippling damage.
<p>
To heal a crippled limb directly using a Stimpak, navigate to the Stats screen in your Pip-Boy, then press &sXBXBtn; to switch to Limb mode. Now you can use &sXBLStick; to select a limb, and &sXBABtn; to use a Stimpak on the selected limb.
<p>
In Hardcore Mode, you may only heal crippled limbs by using Doctor's Bags or by visiting a doctor for medical care.
}}
|{{linkable|}}
|}
===Hotkeys===
{|class="ace-table ace-table-full "
! style="width: 20%;" |Information
! style="width: 10%;" |Image
! style="width: 68%;" |Text
! style="width: 2%;"  |#
|-
|style="text-align: center;" |'''Hotkeys'''<br /><br />HelpHotkeys<br />{{ID|0007234C}}
|[[File:FNVHotkeysHelp.jpg|180px]]
|
{{transcript|text=
You can hotkey inventory items and then use or equip them without accessing your Pip-Boy.
To hotkey an item, hold a number key (1-8) and then left-click on an item in your Pip-Boy.
Now when the Pip-Boy is closed, you can use or equip that item simply by pressing the corresponding number key. Holding down any number key will display all of your current hotkey assignments.
}}
|{{linkable|}}
|-
|style="text-align: center;" |'''Hotkeys (Xbox)'''<br /><br />HelpHotkeysXBox<br />{{ID|000734EE}}
|[[File:HelpHotkeysXbox.jpg|180px]]
|
{{transcript|text=
You can hotkey inventory items and then use or equip them without accessing your Pip-Boy.
To hotkey an item in your Pip-Boy, hold &sXBRBumper; and use the &sXBDPad; to select a hotkey slot.
Now when the Pip-Boy is closed, you can use or equip that item simply by pressing the corresponding &sXBDPad;. Holding down the &sXBDPad; will display all of your current hotkey assignments.
}}
|{{linkable|}}
|}
===Karma===
{|class="ace-table ace-table-full "
! style="width: 20%;" |Information
! style="width: 10%;" |Image
! style="width: 68%;" |Text
! style="width: 2%;"  |#
|-
|style="text-align: center;" |'''[[Karma (Fallout: New Vegas)|Karma]]'''<br /><br />HelpKarma<br />{{ID|0006B250}}
|[[File:FNVKarmaHelp.jpg|thumb|180px]]
|
{{transcript|text=
Karma is an overall indication of your sense of good, evil... or neutrality.  Your Karma starts at Neutral, and changes based on your actions. It can go up to Good or Very Good, or down to Evil or Very Evil. Kind or self-sacrificing acts will net you good Karma. Selfish and malicious acts will earn evil Karma. Sometimes, killing a particularly saintly or terrible enemy will modify your Karma as well.
Though some people in the world react to Karma, most base their opinons off of Reputation. Karma is simply the universe's way of tracking your good and bad deeds in the world.
}}
|{{linkable|}}
|}
===Leveling===
{|class="ace-table ace-table-full "
! style="width: 20%;" |Information
! style="width: 10%;" |Image
! style="width: 68%;" |Text
! style="width: 2%;"  |#
|-
|style="text-align: center;" |'''Leveling'''<br /><br />HelpLeveling<br />{{ID|00000178}}
|[[File:FNVLevelingHelp.jpg|thumb|180px]]
|
{{transcript|text=
When you reach the required number of Experience Points, you will level up automatically, so long as you're not in combat.
Every time you level up, your Health increases, and you gain Skill Points to assign to your skills. You will also gain a new perk every other level.
}}
|{{linkable|}}
|}
===Lockpicking===
{|class="ace-table ace-table-full "
! style="width: 20%;" |Information
! style="width: 10%;" |Image
! style="width: 68%;" |Text
! style="width: 2%;"  |#
|-
|style="text-align: center;" |'''[[Lockpick (Fallout: New Vegas)|Lockpicking]]'''<br /><br />HelpLockpicking<br />{{ID|0000017C}}
|[[File:FNVLockpickingHelp.jpg|thumb|180px]]
|
{{transcript|text=
&-sUActnForward;&-sUActnBack;&-sUActnSldleft;&-sUActnSldright;: Apply torque with the screwdriver
Mouse: Rotate the bobby pin
&sKBF;: Force Lock
When torque is applied, the closer the bobby pin is to the correct position, or "sweet spot," the more the lock will rotate before the bobby pin breaks. Only when the bobby pin is in the correct position will the lock rotate fully, and open.
You can also try to open a lock by forcing it, but if you fail the lock will be permanently broken and can only be opened with a key.
}}
|{{linkable|}}
|-
|style="text-align: center;" |'''Lockpicking (Xbox)'''<br /><br />HelpLockpickingXBox<br />{{ID|00000184}}
|[[File:HelpLockpickingXbox.jpg|thumb|180px]]
|
{{transcript|text=
&sXBRStick;: Apply torque with the screwdriver
&sXBLStick;: Rotate the bobby pin
&sXBXBtn;: Force Lock
When torque is applied, the closer the bobby pin is to the correct position, or "sweet spot," the more the lock will rotate before the bobby pin breaks. Only when the bobby pin is in the correct position will the lock rotate fully, and open.
You can also try to open a lock by forcing it, but if you fail the lock will be permanently broken and can only be opened with a key.
}}
|{{linkable|}}
|}
===Movement and Combat===
{|class="ace-table ace-table-full "
! style="width: 20%;" |Information
! style="width: 10%;" |Image
! style="width: 68%;" |Text
! style="width: 2%;"  |#
|-
|style="text-align: center;" |'''Movement and Combat'''<br /><br />HelpGeneral<br />{{ID|0006D914}}
|[[File:FNVMovementCombatHelp1.jpg|thumb|180px]]<br />[[File:FNVMovementCombatHelp2.jpg|thumb|180px]]
|
{{transcript|text=
&-sUActnForward;: Move forward
&-sUActnBack;: Move backward
&-sUActnSldleft;: Strafe left
&-sUActnSldright;: Strafe right
&sDeviceMouse;: Look around
&-sUActnUse;: Attack
&-sUActnBlock;: Aim/Block
&-sUActnActivate;: Activate Objects
&-sUActnRdyitem;: Reload Weapon (Hold to holster)
&-sUActnMenumode;: Pip-Boy 3000
&-sUActnJump;: Jump
&-sUActnRun;: Run (Toggle)
&-sUActnCrouch;: Sneak (Toggle)
&-sUActnGrab;: Grab
&-sUActnTogglepov;: View Switch (Hold to adjust)
&-sUActnVats;: Vault-Tec Assisted Targeting System (Hold to scan)
}}
|{{linkable|}}
|-
|style="text-align: center;" |'''Movement and Combat (Xbox)'''<br /><br />HelpGeneralXBox<br />{{ID|000BB215}}
|[[File:HelpGeneralXbox.jpg|thumb|180px]]<br />[[File:HelpGeneralXbox2.jpg|thumb|180px]]
|
{{transcript|text=
&sXBLStick;: Move around
&sXBRStick;: Look around
&-sUActnUse;: Attack
&-sUActnBlock;: Aim/Block
&-sUActnActivate;: Activate Objects
&-sUActnRdyitem;: Reload Weapon (Hold to holster)
&-sUActnMenumode;: Pip-Boy 3000
&-sUActnJump;: Jump
&-sUActnCrouch;: Sneak (Toggle)
&-sUActnGrab;: Grab
&-sUActnTogglepov;: View Switch (Hold to adjust)
&-sUActnVats;: Vault-Tec Assisted Targeting System (Hold to scan)
}}
|{{linkable|}}
|}
===Maps===
{|class="ace-table ace-table-full "
! style="width: 20%;" |Information
! style="width: 10%;" |Image
! style="width: 68%;" |Text
! style="width: 2%;"  |#
|-
|style="text-align: center;" |'''Maps'''<br /><br />HelpPipBoyData<br />{{ID|0006D914}}
|[[File:FNVMapsHelp1.jpg|thumb|180px]]<br />[[File:FNVMapsHelp2.jpg|thumb|180px]]
|
{{transcript|text=
The Maps are located in your Pip-Boy's Data section.
The Local Map displays an overhead map of your current location, as well as any nearby doors.
The World Map shows an overhead map of the entire Mojave Wasteland area, and markers for any places that have been discovered during the course of your adventures. You can even fast travel directly to any place you have previously visited.
You can zoom the maps in and out, or place (or move, or delete) a custom map marker.
If your active quest has any quest targets, these will be displayed on both the Local and World Maps.
On the World Map, your path to a quest target is indicated by a dotted line. In some cases, you may need to take a route through different areas, and the dotted line will reflect that.
}}
|{{linkable|}}
|}
===Quests===
{|class="ace-table ace-table-full "
! style="width: 20%;" |Information
! style="width: 10%;" |Image
! style="width: 68%;" |Text
! style="width: 2%;"  |#
|-
|style="text-align: center;" |'''Quests'''<br /><br />HelpPipBoyQuest<br />{{ID|00072357}}
|[[File:FNVQuestsHelp1.jpg|thumb|180px]]<br />[[File:FNVQuestsHelp2.jpg|thumb|180px]]
|
{{transcript|text=
The quest screen in your Pip-Boy's Data section tracks your progress in every quest you have undertaken. To the left is a list of quests: those with bright text are active; those with darkened text have been completed or somehow failed. Your active quest is marked by a small box.
On the right-hand side of the screen are the objectives for each quest. The active objectives have bright text and are on the top of the list; the completed or failed objectives have darkened text and are at the bottom of the list. Some objectives are marked as "(Optional)," and their completion is not necessary to successfully finishing the quest.
You can select any quest as the currently "active" one, or immediately view the location of the active quest's current target on the World Map (if the location is known). Quest Targets are show on your compass and maps for the active quest only.
}}
|{{linkable|}}
|}
===Radiation===
{|class="ace-table ace-table-full "
! style="width: 20%;" |Information
! style="width: 10%;" |Image
! style="width: 68%;" |Text
! style="width: 2%;"  |#
|-
|style="text-align: center;" |'''Radiation'''<br /><br />HelpRadiation<br />{{ID|0007235B}}
|[[File:FNVRadHelp1.jpg|thumb|180px]]<br />[[File:FNVRadHelp2.jpg|thumb|180px]]
|
{{transcript|text=
You can be exposed to radiation either directly from the environment, or by ingesting irradiated food or water. A small amount of radiation will not hurt you, but as your accumulated exposure goes up, you will begin to suffer ill effects, including death, eventually.
Radiation Poisoning Effects:
* 200 rads: -1 EN
* 400 rads: -2 EN, -1 AG
* 600 rads: -3 EN, -2 AG, -1 ST
* 800 rads: -3 EN, -2 AG, -2 ST
* 1000 rads: Death!
Radiation Poisoning does not wear off, but can be healed by a doctor, or by taking RadAway. You can also protect yourself ahead of time by taking Rad-X, which increases your Radiation Resistance.
Your accumulated radiation exposure is displayed in your Pip-Boy, in the Status section of the Stats tab.
}}
|{{linkable|}}
|}
===Radio Signals===
{|class="ace-table ace-table-full "
! style="width: 20%;" |Information
! style="width: 10%;" |Image
! style="width: 68%;" |Text
! style="width: 2%;"  |#
|-
|style="text-align: center;" |'''Radio Signals'''<br /><br />HelpRadio<br />{{ID|0007235C}}
|[[File:FNVRadioSignalsHelp.jpg|thumb|180px]]
|
{{transcript|text=
All the radio signals you have discovered are listed on the Radio screen in the Data tab of your Pip-Boy. Signals listed in bright text are within range, and can be listened to.
Signals listed in darkened text have been discovered, but you are no longer within range -- in order to listen to one of these stations, you have to move back into the signal's receiving range.
}}
}}
|{{linkable|}}
|{{linkable|}}
Line 767: Line 1,399:
|-
|-
|style="text-align: center;" |'''Crafting'''<br /><br />HelpRecipe<br />{{ID|0000018E}}
|style="text-align: center;" |'''Crafting'''<br /><br />HelpRecipe<br />{{ID|0000018E}}
|
|[[File:FNVCraftingHelp.jpg|thumb|180px]]
|
|
{{transcript|text=
{{transcript|text=
Line 773: Line 1,405:


Recipes have skill and ingredient requirements that must be met to proceed. If any requirement is darkened, that requirement has not been met. Any recipe that has all of its requirements fulfilled will appear fully lit. After using a recipe, the product(s) of the recipe will all immediately be available in your inventory.
}}
|{{linkable|}}
|}
===Repairing===
{|class="ace-table ace-table-full "
! style="width: 20%;" |Information
! style="width: 10%;" |Image
! style="width: 68%;" |Text
! style="width: 2%;"  |#
|-
|style="text-align: center;" |'''Repairing'''<br /><br />HelpRepair<br />{{ID|00015E5BC}}
|[[File:FNVRepairingHelp.jpg|thumb|180px]]
|
{{transcript|text=
Weapons and apparel with low Condition suffer from decreased Damage and Damage Threshold, respectively. There are two primary ways to repair low Condition equipment: self-repair and repair vendors.
* Self-Repair: In your Pip-Boy, the Repair menu shows any equipment you currently have that can be used to repair the selected piece of equipment. Highlight the piece of equipment you would like to sacrifice to make the repair. The efficiency of your repair is affected by your character's Repair skill.
* Repair Vendors: Some characters in the world have the ability to repair equipment in exchange for caps. Though they require no special gear to perform the repair, they are limited by their own skill. Extremely talented repair vendors may be able to restore a weapon or piece of apparel to almost perfect condition, but it may be expensive.
Once a weapon is above 75% Condition or piece of apparel is above 50% Condition, it is functioning as well as it can. Repairs made above that Condition are simply maintaining the equipment to keep it at peak performance for a longer period of time.
}}
}}
|{{linkable|}}
|{{linkable|}}
Line 787: Line 1,443:
|-
|-
|style="text-align: center;" |'''[[Fallout: New Vegas reputations|Reputation]]'''<br /><br />HelpReputation<br />{{ID|0000018F}}
|style="text-align: center;" |'''[[Fallout: New Vegas reputations|Reputation]]'''<br /><br />HelpReputation<br />{{ID|0000018F}}
|
|[[File:FNVRepHelp1.jpg|thumb|180px]]<br /><br />[[File:FNVRepHelp2.jpg|thumb|180px]]<br /><br />[[File:FNVRepHelp3.jpg|thumb|180px]]
|
|
{{transcript|text=
{{transcript|text=
Line 816: Line 1,472:
* Hated - Definitely bad.
* Vilified - Most bad.
}}
|{{linkable|}}
|}
===Stealth===
{|class="ace-table ace-table-full "
! style="width: 20%;" |Information
! style="width: 10%;" |Image
! style="width: 68%;" |Text
! style="width: 2%;"  |#
|-
|style="text-align: center;" |'''Stealth'''<br /><br />HelpStealth<br />{{ID|000ABC5A}}
|[[File:FNVStealthHelp1.jpg|thumb|180px]]<br />[[File:FNVStealthHelp2.jpg|thumb|180px]]
|
{{transcript|text=
Your stealth state is displayed when you crouch (&-sUActnCrouch;). [HIDDEN] means nobody detects you. [CAUTION] means someone is searching for you. [DANGER] means you have been detected by an enemy.
How stealthy you are is affected by many factors:
* Sneak skill: Your Sneak skill only helps you when you are crouching. The higher your Sneak skill, the easier it is to remain undetected, steal an item, or pick someone's pocket.
* Line of sight: An enemy is much less likely to detect you if he can't see you.
* Light level: You are harder to see in darker areas.
* Movement: You are hardest to detect when motionless, easiest to detect when running.
* Apparel weight: Heavier apparel makes more noise when moving.
* Sound: Most melee weapons make very little noise; bigger guns make a lot of noise.
Attacking while undetected gives you an automatic "sneak" critical.
}}
|{{linkable|}}
|}
===V.A.T.S.===
{|class="ace-table ace-table-full "
! style="width: 20%;" |Information
! style="width: 10%;" |Image
! style="width: 68%;" |Text
! style="width: 2%;"  |#
|-
|style="text-align: center;" |'''[[Fallout: New Vegas V.A.T.S.|V.A.T.S.]]'''<br /><br />HelpVATS<br />{{ID|0000017D}}
|[[File:FNVVATSHelp.jpg|thumb|180px]]
|
{{transcript|text=
Welcome to the Vault-Tec Assisted Targeting System, or V.A.T.S.
V.A.T.S. displays the chance you will hit, along with the condition of each body part.
&sMouseLeftButton;: Attack your target
&sMouseRightButton;: Cancel an attack
&sKBE;: Accept your actions
Left click on the left or right arrows to switch to a new target.
The number of attacks you can make is limited by your Action Points.
}}
|{{linkable|}}
|-
|style="text-align: center;" |'''V.A.T.S. Advanced'''<br /><br />HelpVATS2<br />{{ID|000B5ED1}}
|[[File:FNVVATSAdvHelp1.jpg|thumb|180px]]<br />[[File:FNVVATSAdvHelp2.jpg|thumb|180px]]<br />[[File:FNVVATSAdvHelp3.jpg|thumb|180px]]
|
{{transcript|text=
The Vault-Tec Assisted Targeting System, or V.A.T.S., allows you to pause the game, assess any combat situation tactically, and target the specific body parts of any enemies onscreen.
Pressing and holding &-sUActnVats; will pause the game and scan the area of targets; arrows to the left and right indicate threats that are currently offscreen.
To zoom in on an enemy, simply select it and release &-sUActnVats;. You are now able to target the individual body parts of that enemy.
The percentage value next to a body part indicates the chance to hit that body part with each shot. The small bar next to the body part indicates its condition; when the condition of a body part is completely reduced, that body part is crippled, and the targeted enemy will suffer the obvious ill effects -- crippling the legs reduces movement speed and any lunging attacks; crippling the arms affects accuracy, etc.
When using a melee weapon or unarmed combat, you will need to be close to have a chance to hit. Both melee and grenades are "full body" attacks, and you cannot specify a specific body part. As you raise your Melee Weapons or Unarmed skill, you will gain the ability to perform special attacks with weapons using those skills.
Every attack on a body part uses up Action Points. Generally, the smaller a weapon, the fewer Action Points are required for every shot. Keep in mind that you're not limited to shooting at just one target -- at any time, you can switch available targets, and attack them as well, so long as you have remaining Action Points.
When you've used up all of your Action Points, and are ready to leave V.A.T.S., press &sKBSpace;.
}}
|{{linkable|}}
|-
|style="text-align: center;" |'''V.A.T.S. (Xbox)'''<br /><br />HelpVATSXBox<br />{{ID|00000183}}
|[[File:HelpVATSXbox.jpg|thumb|180px]]
|
{{transcript|text=
Welcome to the Vault-Tec Assisted Targeting System, or V.A.T.S.
V.A.T.S. displays the chance you will hit, along with the condition of each body part.
&-sUActnUse;: Attack your target
&sXBLStick;: Change body parts
&sXBRStick;: Change targets
&sXBBBtn;: Cancel an attack
&sXBABtn;: Accept your actions
The number of attacks you can make is limited by your Action Points.
}}
|{{linkable|}}
|-
|style="text-align: center;" |'''V.A.T.S. Advanced (Xbox)'''<br /><br />HelpVATS2XBox<br />{{ID|0006D913}}
|[[File:HelpVATSAdvXbox1.jpg|thumb|180px]]<br />[[File:HelpVATSAdvXbox2.jpg|thumb|180px]]<br />[[File:HelpVATSAdvXbox3.jpg|thumb|180px]]
|
{{transcript|text=
The Vault-Tec Assisted Targeting System, or V.A.T.S., allows you to pause the game, assess any combat situation tactically, and target the specific body parts of any enemies onscreen.
Pressing and holding &-sUActnVats; will pause the game and scan the area of targets.
To zoom in on an enemy, simply select it and release &-sUActnVats;. You are now able to target the individual body parts of that enemy.
The percentage value next to a body part indicates the chance to hit that body part with each shot. The small bar next to the body part indicates its condition; when the condition of a body part is completely reduced, that body part is crippled, and the targeted enemy will suffer the obvious ill effects -- crippling the legs reduces movement speed and any lunging attacks; crippling the arms affects accuracy, etc.
When using a melee weapon or unarmed combat, you will need to be close to have a chance to hit. Both melee and grenades are "full body" attacks, and you cannot specify a specific body part. As you raise your Melee Weapons or Unarmed skill, you will gain the ability to perform special attacks with weapons using those skills.
Every attack on a body part uses up Action Points. Generally, the smaller a weapon, the fewer Action Points are required for every shot. Keep in mind that you're not limited to shooting at just one target -- at any time, you can switch available targets, and attack them as well, so long as you have remaining Action Points.
When you've used up all of your Action Points, and are ready to leave V.A.T.S., press &sXBABtn;.
}}
}}
|{{linkable|}}
|{{linkable|}}
Line 830: Line 1,609:
|-
|-
|style="text-align: center;" |'''Weapons'''<br /><br />HelpWeapons<br />{{ID|0000018A}}
|style="text-align: center;" |'''Weapons'''<br /><br />HelpWeapons<br />{{ID|0000018A}}
|
|[[File:NVWeaponsHelp1.jpg|thumb|180px]]<br /><br />[[File:NVWeaponsHelp2.jpg|thumb|180px]]
|
|
{{transcript|text=
{{transcript|text=
Line 845: Line 1,624:
|{{linkable|}}
|{{linkable|}}
|}
|}
==Miscellaneous==
==Miscellaneous==
===Mother Deathclaw===
Line 855: Line 1,635:


|-
|-
|style="text-align: center;" |<br /><br />QJDeathclawMotherMessage<br />{{ID|000E8810}}
|style="text-align: center;" |<br /><br />'''QJDeathclawMotherMessage'''<br />{{ID|000E8810}}
|[[File:FNV MessageBox Mother Deathclaw.png|180px]]
|[[File:FNV MessageBox Mother Deathclaw.png|180px]]
|
|
Line 873: Line 1,653:


|-
|-
|style="text-align: center;" |'''X-13 Experimental Stealth Suit Complete'''<br /><br /> - <br /> -
|style="text-align: center;" |<br /><br />'''X-13 Experimental Stealth Suit Complete'''<br />{{DLC ID|00BE8F}}
|[[File:Old World Blues Stealth Suit 3.jpg|180px]]
|[[File:Old World Blues Stealth Suit 3.jpg|180px]]
|
|
Line 881: Line 1,661:
|{{linkable|}}
|{{linkable|}}
|}
|}
==To place==
<gallery>
FNV Mbox Prospectors Saloon Radio.jpg
FNVGSBrokenSMGMSG.jpg
FNVGSRadioFixedMSG.jpg
FNVMcCarranFoodProcessorFirstMsg.jpg
FNVMcCarranFoodProcessorFailMsg.jpg
FNVMcCarranFoodProcessorSuccessMsg.jpg
FNVMcCarranFoodProcessorFailRepairMsg.jpg
FNVMcCarranFoodProcessorSuccessRepairMsg.jpg
</gallery>


{{DEFAULTSORT:Fallout 03.5}}

Latest revision as of 20:40, 30 April 2024

Icon vaulttec.png  Independent Fallout Wiki Source Texts - Game Content  Icon vaulttec.png


This page lists transcripts of pop-up message boxes in Fallout: New Vegas.

Items

Information Image Text #
Snow Globe

vSnowglobeFirstMessage
0016AEE1
FNVSnowglobeMsgBox.jpeg
Transcript.png

You found a Limited Edition Mojave Landmark Snowglobe!

These rare, pre-War artifacts are widely considered to be useless baubles, but rumor has it some collectors will pay dearly for them.

Mojave Express dropbox

vMojaveExpressTutorial
0015F237
FNVMojaveExpressTutorialMsg.jpeg
Transcript.png

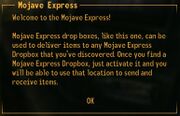
Welcome to the Mojave Express!

Mojave Express drop boxes, like this one, can be used to deliver items to any Mojave Express Dropbox that you've discovered. Once you find a Mojave Express Dropbox, just activate it and you will be able to use that location to send and receive items.

Strange still

NVDLC03BattleBrewCraftMsg
xx01494A
Strange still message box.jpg
Transcript.png

Attached to the still is a note with the following ingredients: 1 Vodka, a Mutant Cave Fungus, 1 Salient Green.

Laser Detonator

NVDLC04DetonatorMSG
xx00D878
Laser detonator message box.jpg
Transcript.png

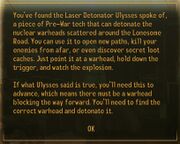
You've found the Laser Detonator Ulysses spoe of, a piece of Pre-War tech that can detonate the nuclear warheads scattered around the Lonesome Road. You can use it to open new paths, kill your enemies from afar, or even discover secret loot caches. Just pint it at a warhead, hold down the trigger, and watch the explosion.

If what Ulysses said is true, you'll need this in advance, which means there must be a warheid blocking the way forward. You'll need to find the correct warhead and detonate it.

Quests

Second Battle of Hoover Dam

Information Image Text #
Mr. House

VEndGameWarningMsgHouse
00171DC4
FNVVEndGameWarningMsgHouse.jpeg
Transcript.png

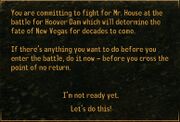
You are committing to fight for Mr. House at the battle for Hoover Dam which will determine the fate of New Vegas for decades to come.

If there's anything you want to do before you enter the battle, do it now - before you cross the point of no return.

Independent

VEndGameWarningMsgIndy
00171DC3
FNVVEndGameWarningMsgIndy.jpeg
Transcript.png

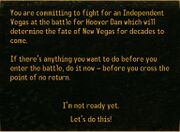
You are committing to fight for an Independent Vegas at the battle for Hoover Dam which will determine the fate of New Vegas for decades to come.

If there's anything you want to do before you enter the battle, do it now - before you cross the point of no return.

Caesar's Legion

VEndGameWarningMsgLegion
00171DC2
FNVVEndGameWarningMsgLegion.jpeg
Transcript.png

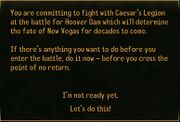
You are committing to fight with Caesar's Legion at the battle for Hoover Dam which will determine the fate of New Vegas for decades to come.

If there's anything you want to do before you enter the battle, do it now - before you cross the point of no return.

New California Republic

VEndGameWarningMsgNCR
00171DC1
FNVVEndGameWarningMsgNCR.jpeg
Transcript.png

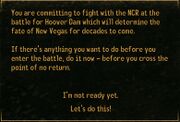
You are committing to fight with the NCR at the battle for Hoover Dam which will determine the fate of New Vegas for decades to come.

If there's anything you want to do before you enter the battle, do it now - before you cross the point of no return.

Locations

Goodsprings

Information Image Text #
Goodsprings Radio
Prospector Saloon

GSBrokenRadioMsg
00109086
FNV Mbox Prospectors Saloon Radio.jpg
Transcript.png

An examination of the radio's internal components reveals that several parts and connections were popped loose when the radio hit the floor. It should be a fairly simple repair job to get it working again.

[Repair of 20 or greater required.]


Goodsprings Radio - Fixed
Prospector Saloon

GSFixedRadioMsg
00109088
FNVGSRadioFixedMSG.jpg
Transcript.png

You fixed the Prospector Saloon's radio.


Broken SMG
Doc Mitchell's House

GSBrokenSMGMsg
00105233
FNVGSBrokenSMGMSG.jpg
Transcript.png

This 9mm submachine gun is broken but can possibly be restored to a fully functioning weapon.

[Repair of 25 or greater required.]

Chemistry Set
Doc Mitchell's House

GSChemistrySetMsg
00105237
FNVGSChemistrySetMSG.jpg
Transcript.png

There appears to be enough chemical components available to create a small quantity of chems - assuming one has the knowledge to do such a thing.

[Science of 25 or greater required.]

Unification Monument

Information Image Text #
Unification Monument
Mojave Outpost

MojaveOutpostPlaqueMessage
0016145F
FNV NCR Unif Monum (2).png
Transcript.png

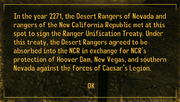
In the year 2271, the Desert Rangers of Nevada and rangers of the New California Republic met at this spot to sign the Ranger Unification Treaty. Under this treaty, the Desert Rangers agreed to be absorbed into the NCR in exchange for NCR's protection of Hoover Dam, New Vegas, and southern Nevada against the forces of Caesar's Legion.

Primm

Information Image Text #
Vance's outfits
Vikki and Vance Casino

PrimmVanceOutfitMessage
000E3776
FNV Vance outfits placard.png
Transcript.png

These mannequins display replicas of some of the clothing that was found in the trunk of Vikki and Vance's death car. Vance didn't share Vikki's sense of fashion, and chose to dress himself how he envisioned a gangster would dress.

Vikki's outfits
Vikki and Vance Casino

PrimmVikkiOutfitMessage
000E3775
FNV Vikki placard.png
Transcript.png

These replica outfits show just how conscious Vikki was of the styles of the period. Vikki was well known for her sense of fashion and her fixation on expensive clothing was thought to be one of the reasons the pair chose a life of crime.

Vance's gun
Vikki and Vance Casino

PrimmMuseumPlaqueMessage
000E288E
FNV Vance's gun placard.png
Transcript.png

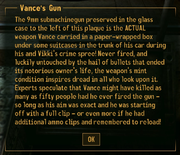
The 9mm submachinegun preserved in the glass case to the left of this plaque is the ACTUAL weapon Vance carried in a paper-wrapped box under some suitcases in the trunk of his car during his and Vikki's crime spree! Never fired, and luckily untouched by the hail of bullets that ended its notorious owner's life, the weapon's mint condition inspires dread in all who look upon it. Experts speculate that Vance might have killed as many as fifty people had he ever fired the gun - so long as his aim was exact and he was starting off with a full clip - or even more if he had additional ammo clips and remembered to reload!

Underpass

Information Image Text #
Underpass Unused Content

UnderpassWaterActiveMsg
00104687 Unused Content
FNVUnderpassWaterActiveMsg.jpeg
Transcript.png

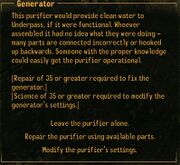
This purifier would provide clean water to Underpass, if it were functional. Whoever assembled it had no idea what they were doing - many parts are connected incorrectly or hooked up backwards. Someone with the proper knowledge could easily get the purifier operational.

[Repair of 35 or greater required to fix the generator.]
[Science of 35 or greater required to modify the generator's settings.]

Black Mountain

Information Image Text #
Black Mountain Warning

BMWarningNoteMessage
000E8541
FNVBMWarningNoteMessage.jpeg
Transcript.png

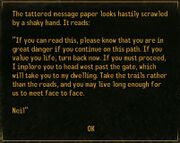
The tattered message paper looks hastily scrawled by a shaky hand. It reads:

"If you can read this, please know that you are in great danger if you continue on this path. If you value you life, turn back now. If you must proceed, I implore you to head west past the gate, which will take you to my dwelling. Take the trails rather than the roads, and you may live long enough for us to meet face to face.

Neil"

Boulder City Memorial

Information Image Text #
Boulder City Memorial
Transcript.png

On this spot in the year 2277, rangers and soldiers of the New California Republic turned back the forces of Caesar's Legion during the Battle of Hoover Dam. Over one hundred men and women gave their lives on Nevada soil to defend local civilians and the principles of the Republic. May this humble stone be an enduring memorial to their valor and sacrifice.

HELIOS One

Information Image Text #
HELIOS One

vHeliosPythonMessage
000E3637
VHeliosPythonMessage.jpg
Transcript.png

This robot has been fitted with a variety of tools specialized for industrial maintenance. There is a slot at the back of the head where it looks like a keycard could be fit.

(Science of 45 or Poseidon Energy ID Card required)

HELIOS One

vHeliosPythonMessageUseless
000E4B5B
FNV PYTHON Message pop box.jpg
Transcript.png

This robot has been fitted with a variety of tools specialized for industrial maintenance. However, there is nothing left in the room for it to repair. Leave.

HELIOS One

vHeliosAuxGeneratorMessage
000E28CA
VHeliosAuxGeneratorMessage.jpg
Transcript.png

The generator looks to be fine, but some kind of large vermin has chewed into the power cable. With the proper know-how and some scrap metal, you could repair the connection and improve its output bandwidth. Otherwise you'll need help.

(Repair of 35 or higher and one piece of scrap metal required)

HELIOS One

vHeliosAuxGeneratorFixedMessage
000E28CC
VHeliosAuxGeneratorFixedMessage.jpg
Transcript.png

You fixed the wiring. Sufficient electricity should now be flowing to the mainframe computer.

HELIOS One

vHeliosConsoleInactiveMessage
000E42C7
VHeliosConsoleInactiveMessage.jpg
Transcript.png

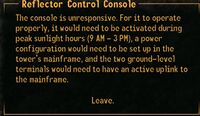
The console is unresponsive. For it to operate properly, it would need to be activated during peak sunlight hours (9 AM - 3 PM), a power configuration would need to be set up in the tower's mainframe, and the two ground-level terminals would need to have an active uplink to the mainframe.


HELIOS One

vHeliosMainframeInactiveMessage
000E28CB
VHeliosMainframeInactiveMessage.jpg
Transcript.png

This mainframe is currently unresponsive. The amount of power reaching the terminal seems to be insufficient.

Sloan

Information Image Text #
Quarry Junction generator

QJGeneratorActiveMsg
0008D19C
FNVQJGeneratorActiveMsg.jpeg
Transcript.png

This generator would provide power to Quarry Junction, if it were functional. Whoever assembled it had no idea what they were doing - many parts are connected incorrectly or hooked up backwards. Someone with the proper knowledge could easily get the generator operational.

The Divide

Information Image Text #
Nuclear warhead

NVDLC04WarheadMSG
xx0094EF
Transcript.png

This is an intact nuclear warhead. If what Ulysses said is true, the Laser Detonator in Hopeville should be able to trigger these to explode.

REPCONN

Information Image Text #
"Boring Old Rod? Or..."
REPCONN Headquarters

REPCONHQTourMessage01
000EACCC
FNV Boring Old Rod.png
Transcript.png

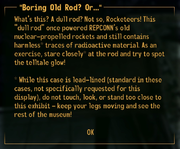
What's this? A dull rod? Not so, Rocketeers! This "dull rod" once powered REPCONN's old nuclear-propelled rockets and still contains harmless* traces of radioactive material. As an exercise, stare closely* at the rod and try to spot the telltale glow!

* While this case is lead-lined (standard in these cases, not specifically requested for this display), do not touch, look, or stand too close to this exhibit - keep your legs moving and see the rest of the museum!

"Plas-Ma What?"
REPCONN Headquarters

REPCONHQTourMessage02
000EACCE
FNV Plasma.png
Transcript.png

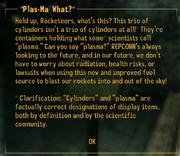
Hold up, Rocketeers, what's this? This trio of cylinders isn't a trio of cylinders at all!* They're containers holding what some* scientists call "plasma." Can you say "plasma?" REPCONN's always looking to the future, and in our future, we don't have to worry about radiation, health risks, or lawsuits when using this new and improved fuel source to blast our rockets into and out of the sky!

* Clarification: "Cylinders" and "plasma" are factually correct designations of display items, both by definition and by the scientific community.

"Radioactive Waste?"
REPCONN Headquarters

REPCONHQTourMessage03
000EACC6
FNV Radioactive Waste.png
Transcript.png

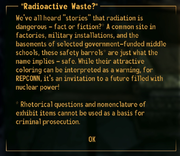
We've all heard "stories" that radiation is dangerous - fact or fiction?* A common site in factories, military installations, and the basements of selected government-funded middle schools, these safety barrels* are just what the name implies - safe. While their attractive coloring can be interpreted as a warning, for REPCONN, it's an invitation to a future filled with nuclear power!

* Rhetorical questions and nomenclature of exhibit items cannot be used as a basis for criminal prosecution.

"Nuclear Family!"
REPCONN Headquarters

REPCONHQTourMessage04
000EACCD
FNV Nuclear Family.png
Transcript.png

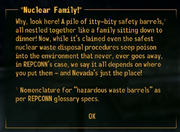
Why, look here! A pile of itty-bity safety barrels,* all nestled together like a family sitting down to dinner! Now, while it's claimed even the safest nuclear waste disposal procedures seep poison into the environment that never, ever goes away, in REPCONN's case, we say it all depends on where you put them - and Nevada's just the place!

* Nomenclature for "hazardous waste barrels" as per REPCONN glossary specs.

"Ready, Set, Launch!"
REPCONN Headquarters

REPCONHQTourMessage05
000EACD1
FNV Ready Set Launch.png
Transcript.png

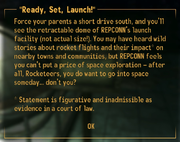
Force your parents a short drive south, and you'll see the retractable dome of REPCONN's launch facility (not actual size!). You may have heard wild stories about rocket flights and their impact* on nearby towns and communities, but REPCONN feels you can't put a price of space exploration - after all, Rocketeers, you do want to go into space someday... don't you?

* Statement is figurative and inadmissible as evidence in a court of law.

"Rockets Away!"
REPCONN Headquarters

REPCONHQTourMessage06
000EACCB
FNV Rockets Away.png
Transcript.png

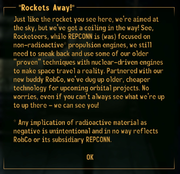
Just like the rocket you see here, we're aimed at the sky, but we've got a ceiling in the way! See, Rocketeers, while REPCONN is (was) focused on non-radioactive* propulsion engines, we still need to sneak back and use some of our older "proven" techniques with nuclear-driven engines to make space travel a reality. Partnered with our new buddy RobCo, we've dug up older, cheaper technology for upcoming orbital projects. No worries, even if you can't always see what we're up to up there - we can see you!

* Any implication of radioactive material as negative is unintentional and in no way reflects RobCo or its subsidiary REPCONN.

"Needlenose"
REPCONN Headquarters

REPCONHQTourMessage07
000EACD0
FNV Needlenose placard.png
Transcript.png

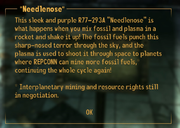
This sleek and purple R77-293A "Needlenose" is what happens when you mix fossil and plasma in a rocket and shake it up! The fossil fuels punch this sharp-nosed terror through the sky, and the plasma is used to shoot it through space to planets where REPCONN can mine more fossil fuels,* continuing the whole cycle again!

*Interplanetary mining and resource rights still in negotiation.

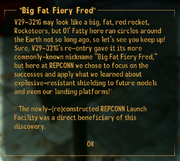
"Big Fat Fiery Fred"
REPCONN Headquarters

REPCONHQTourMessage08
000EACC4
FNV Big Fat Fiery Fred.png
Transcript.png

V29-321G may look like a big, fat, red rocket, Rocketeers, but Ol' Fatty here ran circles around the Earth not so long ago, so let's see you keep up! Sure, V29-321G's re-entry gave it its more commonly-known nickname "Big Fat Fiery Fred," but here at REPCONN we chose to focus on the successes and apply what we learned about explosive-resistant shielding to future models and even our landing platforms!*

*The newly-(re)constructed REPCONN Launch Facility was a direct beneficiary of this discovery.

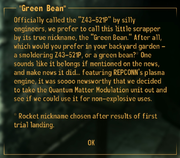
"Green Bean"
REPCONN Headquarters

REPCONHQTourMessage09
000EACC5
FNV Green Bean placard.png
Transcript.png

Officially called the "Z43-521P" by silly engineers, we prefer to call this little scrapper by its true nickname, the "Green Bean." After all, which would you prefer in your backyard garden - a smoldering Z43-521P, or a green bean?* One sounds like it belongs if mentioned on the news, and make news it did... featuring REPCONN's plasma engine, it was soooo newsworthy that we decided to take the Quantum Matter Modulation unit out and see if we could use it for non-explosive uses.

*Rocket nickname chosen after results of first trial landing.

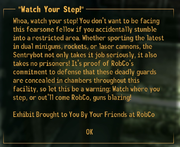
"Watch Your Step!"
REPCONN Headquarters

REPCONHQTourMessage10
000EACC7
FNV Watch your step.png
Transcript.png

Whoa, watch your step! You don't want to be facing this fearsome fellow if you accidentally stumble into a restricted area. Whether sporting the latest in dual miniguns, rockets, or laser cannons, the Sentrybot not only takes it job seriously, it also takes no prisoners! It's proof of RobCo's commitment to defense that these deadly guards are concealed in chambers throughout this facility, so let this be a warning: Watch where you step, or out'll come RobCo, guns blazing!

Exhibit Brought to You By Your Friends at RobCo

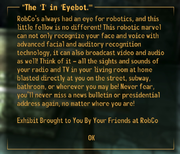
"The 'I' in 'Eyebot.'"
REPCONN Headquarters

REPCONHQTourMessage11
000EACC8
FNV Eyebot message box.png
Transcript.png

RobCo's always had an eye for robotics, and this little fellow is no different! This robotic marvel can not only recognize your face and voice with advanced facial and auditory recognition technology, it can also broadcast video and audio as well! Think of it - all the sights and sounds of your radio and TV in your living room at home blasted directly at you on the street, subway, bathroom, or wherever you may be! Never fear, you'll never miss a news bulletin or presidential address again, no matter where you are!

Exhibit Brought to You By Your Friends at RobCo

"The 'Hand' in 'Handy'"
REPCONN Headquarters

REPCONHQTourMessage12
000EACC9
FNV Hand in Handy.png
Transcript.png

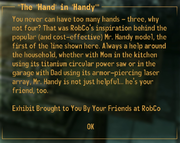
You never can have too many hands - three, why not four? That was RobCo's inspiration behind the popular (and cost-effective) Mr. Handy model, the first of the line shown here. Always a help around the household, whether with Mom in the kitchen using its titanium circular power saw or in the garage with Dad using its armor-piercing laser array, Mr. Handy is not just helpful... he's your friend, too.

Exhibit Brought to You By Your Friends at RobCo

"It's Got Wheels!"
REPCONN Headquarters

REPCONHQTourMessage13
000EACCA
FNV Its Got Wheels.png
Transcript.png

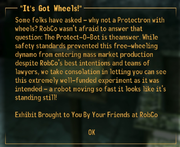
Some folks have asked - why not a Protectron with wheels? RobCo wasn't afraid to answer that question: The Protect-O-Bot is the answer. While safety standards prevented this free-wheeling dynamo from entering mass market production despite RobCo's best intentions and teams of lawyers, we take consolation in letting you can see this extremely well-funded experiment as it was intended - a robot moving so fast it looks like it's standing still!

Exhibit Brought to You By Your Friends at RobCo

"Our Rich, Rich Solar System"
REPCONN Headquarters

REPCONHQTourMessage14
000EACCF
FNV Rich Rich Solar System.png
Transcript.png

A model of our solar system (not actual size). Beautiful, isn't it? RobCo, with its subsidiary REPCONN, has often gazed into the night sky, seeing the rich pageant of stars and planets above us. Our goal? To send unmanned rockets to these other systems, seeing their beauty firsthand while mining ever deeper into each planet's surface for precious resources needed here at home. This is our promise to mankind, extending our reach into a future where the number of RobCo and REPCONN rockets match the stars in the sky.

This Exhibit Brought To You By Your Friends at RobCo

Help

Ammo

Information Image Text #
Ammo

HelpAmmo
0000018C
FNVAmmoHelp1.jpg

FNVAmmoHelp2.jpg
Transcript.png

Ammunition is used by almost all Guns and Energy Weapons but is sometimes used by other weapon types. Basic ammo types have no special effects, but ammo subtypes may increase damage, reduce an enemy's Damage Threshold, or even decrease a weapon's spread. Effects are listed on the ammo submenu when the ammo is highlighted. Most weapons can use any ammo subtype that starts with the same name as the base ammo. Common ammo subtypes include:

  • Armor Piercing: Ignores a large portion of the enemy's Damage Threshold, does slightly more damage.


  • Hollow Point: Does much more damage, but is easily blocked by armor.


  • Over Charge: Used by Energy Weapons, increases damage but degrades the weapon more quickly.


  • Slug: Used by shotguns, slugs replace buckshot with a single, large bullet that is more accurate.


To switch ammo subtypes, equip them on this menu. Outside of the Pip-Boy, press 2 to cycle through ammo subtypes for your currently equipped weapon.

Ammo (Xbox)

HelpAmmoXbox
0000018D
HelpAmmoXbox1.jpg

HelpAmmoXbox2.jpg
Transcript.png

Ammunition is used by almost all Guns and Energy Weapons but is sometimes used by other weapon types. Basic ammo types have no special effects, but ammo subtypes may increase damage, reduce an enemy's Damage Threshold, or even decrease spread. Effects are listed on the ammo submenu when the ammo is highlighted. Most weapons can use any ammo subtype that starts with the same name as the base ammo. Common ammo subtypes include:

  • Armor Piercing: Ignores a large portion of the enemy's Damage Threshold, does slightly more damage.


  • Hollow Point: Does much more damage, but is easily blocked by armor.


  • Over Charge: Used by Energy Weapons, increases damage but degrades the weapon more quickly.


  • Slug: Used by shotguns, slugs replace buckshot with a single, large bullet that is more accurate.


To switch ammo subtypes, equip them on this menu. Outside of the Pip-Boy, press &sXBDPadUp; to cycle through ammo subtypes for your currently equipped weapon.

Apparel

Information Image Text #
Apparel

HelpApparel
0000018B
FNVApparelHelp1.jpg

FNVApparelHelp2.jpg
Transcript.png

Apparel can consist of many different types of gear ranging from clothing and armor to sunglasses and hats.

  • DT: Some apparel grants Damage Threshold (DT) to the wearer. Your DT is the sum of all DT for currently equipped apparel plus any bonuses from perks or chems. DT is directly subtracted from incoming damage, so a higher DT provides superior protection. Though a small percentage of damage can get through even the thickest armor, a high DT is quite valuable.


  • CND: Apparel's Condition (CND) affects how much protection it provides. Apparel above 50% CND provides maximum protection and only needs to be maintained.


  • Light/Medium/Heavy: Medium and Heavy apparel will slow characters down when equipped.


  • Repair: This option opens the Repair submenu, which allows apparel to be repaired by salvaging parts from similar items.

Barter

Information Image Text #
Barter

HelpBarter
0000017F
FNVBarterHelp1.jpg

FNVBarterHelp2.jpg
Transcript.png

The Barter screen allows you to trade, buy or sell items. The types of items that can be traded, bought, or sold depend on the person you're trading with. The prices you get for buying or selling depend on your Barter skill.

To Barter, simply select an item and move it from your inventory into the other person's (if you want to sell or trade one of your own items) or from the other person's inventory into your own (if you want to buy or trade for one of their items).

As items are moved back and forth, caps will also be automatically moved between both parties. This is represented by the large "caps" arrow in the middle.

If the arrow is darkened, it means one of you doesn't have enough caps to complete the transaction. You cannot accept the barter if you don't have enough caps. But you can accept it if the other person doesn't have enough, but at this point, you are giving items away for free.

Caravan

Information Image Text #
Starting Caravans

HelpCaravanStarting Caravans
00000188
FNVCaravanStartingCaravansHelp.jpg
Transcript.png

The first phase of Caravan game play involves each player drawing eight cards from his or her deck. From this hand, each player, in turn, lays down one numbered card or ace per "track" on the three caravans. A player's three caravans are competing for contracts with their opponent's caravans opposite them on the same track.

If a player has no numbered cards or aces in his or her hand, or if he or she is unhappy with any given card currently in hand, the player may discard and draw from his or her own deck. However, discarded cards are out of play for the current game and a smaller deck increases the player's odds that they will be forced to forfeit the game through exhaustion.

Deck Building

HelpCaravanDeckBuilding
00000187
FNVCaravanDeckBuildingHelp.jpg
Transcript.png

To play Caravan, you must assemble a deck that consists of at least 30 cards. Cards may be found in the world or purchased from vendors. You may assemble any arrangement of cards, but certain deck compositions will have strengths and weaknesses against any given opponent.

Once you have selected a satisfactory deck, you may proceed to game play. This interface will always remember the last Caravan deck you assembled, allowing for easy modification on subsequent games.

Contract War

HelpCaravanContractWar
00000189
FNVCaravanContractWarHelp.jpg


FNVCaravanContractWarHelp2.jpg


FNVCaravanContractWarHelp3.jpg


FNVCaravanContractWarHelp4.jpg


FNVCaravanContractWarHelp5.jpg
Transcript.png

Most game play in Caravan occurs during the Contract War. In this phase, both players are attempting to build their caravans and get them signed. To do this, their caravan must be neither light (below 21) or burdened (over 26). They must also compete with their opponent on the same track to prevent being outbid within the legal range.

On each of the three tracks, a caravan is considered signed if its value is from 21 to 26 and it is higher than the opponent's caravan on the same track. If two caravans are tied, neither is signed until the tie is broken. The game ends when all three tracks have signed contracts. Note: it is possible for a player to win while signing only two of the three contracts (the third going to the opponent). In such cases, all winnings still go to the overall victor.

Players have the following options on their turn:

  • Play one card and draw a new card from his or her deck.
  • Discard one card from his or her hand and draw a new card to replace it.
  • Remove one of his or her own caravans from the table, discarding all cards in it.


Caravans are primarily built with numbered cards and aces, which can be placed in the player's caravans according to the following rules. Caravans with more than one card have a direction (ascending or descending) and a suit. Direction is determined by the last two cards in a caravan, suit by the last card in a caravan. All subsequent cards must continue in the same direction OR they must match suit. Cards of the same numerical value cannot be played in sequence, regardless of suit.

Face cards can be attached to numbered cards and aces in any player or opponent caravan. Face cards affect numbered cards and aces in various ways:

  • Joker - Played against A, 2-10. Effects change based on whether it is an ace or numbered card (see below). Multiple jokers may be played on the same card.
  • Ace - Value of 1. Jokers played on aces remove all other non-face cards of the ace's suit from the table. E.g. a joker played on an ace of spades removes all spades (except face cards and that card, specifically) from the table.
  • 2-10 - Listed value. Jokers played on these cards remove all other cards of this value from the table. E.g. a joker played on a 4 of hearts removes all 4s (other than that card, specifically) from the table.
  • Jack - Played against A, 2-10. Removes that card, along with any face cards attached to it.
  • Queen - Played against A, 2-10. Reverses the current direction of the hand, changes the current suit of the hand. Multiple queens may be played on the same card.
  • King - Played against A, 2-10. Multiplies the value of the card upon which it is played. Multiple kings on the same card will have a multiplicative effect. E.g. one king on a 3 = 6. Two kings on a 3 = 12.
Betting

HelpCaravanBetting
00000186
FNVCaravanBettingHelp.jpg
Transcript.png

Caravan players begin the game by establishing a mutual bet. There is only one betting phase per game. Since Caravan has its roots in merchant caravans, players are allowed to use any common currency available, regardless of its origins. Though bottle caps are common, players may also offer NCR dollars or Legion coins. Once a bet is established, players move on to deck building.

Compass

Information Image Text #
Compass

HelpCompass
00072346
FNVCompassHelp.jpg
Transcript.png

In addition to showing the direction you are currently facing, your compass displays several other useful pieces of information.

If you have an active quest, any quest targets will be displayed on your compass as arrows. A quest target will flash faster and faster as you get closer to it. If you have placed your own marker on the map, this will be displayed as a transparent arrow.

People and creatures that you perceive are displayed on the compass as vertical bars. Red bars indicate enemies.

Out in the Wasteland, the compass also indicates nearby locations as small triangles.

Crime

Information Image Text #
Crime

HelpCrime
0007234D
FNVCrimeHelp1.jpg


FNVCrimeHelp2.jpg
Transcript.png

Crimes are divided into two categories: major and minor.

Minor crimes cause only the victim to become hostile to you:

  • Theft: If the owner sees you steal something that she owns, she will try to take it back from you. If you try to escape, or persist in stealing from her, she will attack you (or run for help). If you fight back, you are now committing a major crime (Assault, see below).


  • Trespass: If the owner sees you open a locked door, container, or computer, he will immediately attack you.


Major crimes cause the victim and the victim's friends to become hostile to you:

  • Assault: Attacking someone without provocation, or fighting back when someone attacks you for a minor crime.


  • Murder: If there are witnesses who care about the victim, they will become hostile to you.


If a fight starts that you did not intend, you can attempt to yield by holstering your weapon. This may or may not be successful depending on how the attacker feels about you.

Crippling

Information Image Text #
Crippling

HelpCrippling
000BE8D4
FNVCripplingHelp1.jpg

FNVCripplingHelp2.jpg
Transcript.png

The effects of being crippled depend on the limb. These effects apply to you as well as to your enemies.

  • Head: Reduced perception, concussion effect.


  • Arms: Reduced aiming ability. Enemies will be disarmed at the moment their arm is crippled.


  • Chest: Higher chance to be staggered when taking damage.


  • Legs: Reduced run speed. Enemies cannot perform leaping or charging attacks.


Some enemies have Antennae or a Combat Inhibitor. Crippling that will cause them to frenzy, attacking anything near them.

Dialogue

Information Image Text #
Dialogue

HelpDialogue
00000179
FNVDialogueHelp1.jpg

FNVDialogueHelp2.jpg
Transcript.png

When in dialogue with a character, simply select the response that seems most appropriate to the situation... and be prepared for the character you're talking with to react accordingly.

Occasionally, you will be presented with a Speech Challenge. A Speech Challenge is a response preceded by the word "Speech" and the percentage chance of success; the higher your Speech skill, the greater the chance of success.

Succeed in a Speech Challenge, and you'll achieve the results indicated by the response. Fail a Speech Challenge, and future Speech Challenges with that character will be lowered.

You may also be presented with responses preceded by a certain Attribute or Skill, like [Strength] or [Science]. These responses are only visible if you have the minimum required value in the Attribute or Skill. So, there is never a percentage associated with these responses, because there is no way to "fail" them -- selecting a special Attribute or Skill response is always to your benefit.

Drugs and Addiction

Information Image Text #
Drugs and Addiction

HelpDrugs
00072357
FNVDrugsAddictionHelp.jpg
Transcript.png

Each time you take a chem or drink alcohol, your chance of becoming addicted to it goes up. If you stop using the drug for a while, this chance will drop. Each drug has its own addiction chance, so using one type will not increase your chance of becoming addicted to another.

Addiction will hurt some of your S.P.E.C.I.A.L. attributes. These penalties go away temporarily if you take that drug again. A doctor can cure you of any addiction, for a price.

You cannot become addicted to Stimpaks, Rad-X or RadAway.

Faction Armor

Information Image Text #
Faction Armor

VFactionOutfitTutorial
0016223B
FNVFactionArmorHelp.jpg
Transcript.png

You have equipped faction armor! Faction armor disguises you as a member of that faction. Members of that faction now consider you a friend, while enemies of that faction will attack you on sight regardless of your personal faction relation with them. Any reputation changes that occur while wearing faction armor still affect your character.

Security personnel such as guards and watchdogs will see through your disguise and alert anyone nearby, so watch out!

Games

Information Image Text #
Slots

HelpSlots
00172096
FNVSlotsHelp.jpg
Transcript.png

Slots are casino gambling machines that have three or more reels that spin when a button is pushed or lever is pulled. Each reel randomly stops on or between one of many symbols on the reel. Depending on the combination of symbols that comes up, the player will either lose his or her bet or receive a payout based on the odds of the combination coming up.

Different slot machines have different numbers of symbols and correspondingly different payout odds. You can check the payout odds from within the game at any time.

Roulette

HelpRoulette
00172095
FNVRouletteHelp1.jpg


FNVRouletteHelp2.jpg


FNVRouletteHelp3.jpg
Transcript.png

Roulette is a game of chance in which a ball is spun on a spinning wheel marked with 38 colored and numbered pockets. As the ball loses momentum, it eventually drops into one of the pockets. Before the ball is spun, players place bets on individual numbers or groups of numbers, the colors red or black, or whether the number will be odd or even. If the ball lands in a pocket covered by one of the player's bets, he or she receives a reward proportional to the odds of his or her bet. Player bets fall into two categories: inside bets and outside bets.

Inside Bets - Inside bets are placed on the numbered sections of the board or on the outside edges.

  • Straight-Up - A single number. The chip is entirely inside the square.
  • Split - Two adjoining numbers. The chip is placed on the line between the numbers.
  • Street - Three numbers in a horizontal line. The chip is placed at the edge of a line.
  • Six Line - Two adjoining streets. The chip is placed at the edge between two streets.
  • Corner - Four numbers in a square. The chip is placed at the intersection of the four numbers.
  • Basket - 0, 1, and 2; 0, 00, and 2; or 00, 2, and 3. The chip is placed at the intersection between the three numbers.
  • Top Line - 0, 00, 1, 2, and 3. The chip is placed at the corner of 0 and 1.


Outside Bets - Outside bets are played off of the main numbered section of the board and never include 0 or 00.

  • 1-18, 19-36 - The first and second halves of the numbered board.
  • Red, Black - Red and black numbers.
  • Even, Odd - Even and odd numbers.
  • 1st, 2nd, 3rd Dozen - The first (1-12), second (13-24) or third (25-36) set of numbers.
  • 1st, 2nd, 3rd Column - A bet on an entire vertical column of numbers. The chip is placed at the base of the column.
Blackjack

HelpBlackjack
00172094
FNVBlackjackHelp1.jpg


FNVBlackjackHelp2.jpg


FNVBlackjackHelp3.jpg


FNVBlackjack4.jpg
Transcript.png

Blackjack is a game played with one more standard decks of playing cards. In Fallout: New Vegas, it is played between the Courier and a casino dealer. The goal is to play a hand of two or more cards up to, but not exceeding, a combined value of 21 points. The value of each hand is determined by adding together the values of each individual card. Cards 2-10 are worth their listed value. Face cards (Jack, Queen, King) are worth 10 points. Aces are worth either 1 or 11 points, whichever is more advantageous. A hand that exceeds 21 in total value is considered a "bust" and immediately loses.

After the initial bet is made, the player and dealer are both dealt two cards. Based on the Courier's current hand, the player has different options:

  • Hit - Add a new card to the Courier's hand. The player must accept the value of this card, though aces provide whatever value is most advantageous at any given time.


  • Stay - Courier's hand is effectively "locked" and the dealer will deal cards into his or her own hand until his or her hand is at least 17. Note: at some casinos, dealers will continue to hit on a "soft" 17 that contains an ace. In either case, the dealer has no decision-making process and will always follow the listed rule.


  • Double Down - The Courier's bet is doubled but the dealer will give the Courier's hand only a single additional card.


  • Split - If the Courier's initial hand is a pair, the player may double his or her bet and split the pair into two separate hands that are played individually.


  • Surrender - This option is only available immediately after the first cards are dealt. It offers the player the option to sacrifice half of his or her bet and immediately fold. It is typically only done when the player's hand is particularly bad and the dealer is showing a very strong hand (for example, an ace).


Once the dealer has completed dealing into his or her own hand following the player's choice to stay, the values of the Courier's hand and the dealer's hand are compared. Assuming neither party has busted (gone over 21), the higher value wins. In the case of a tie, the hand is considered a push. If the dealer has "blackjack" (an ace and a ten-value card), he or she automatically wins unless the Courier also has blackjack. In that case, the hand is considered a push.

Individual casinos use different numbers of card decks, pay out natural blackjack hands at different odds, and shuffle their decks with varying frequency. Pay close attention to these details to develop advanced playing strategies.

Glossary

Information Image Text #
Glossary

HelpGlossary
00072357
FNVGlossary1.jpg

FNVGlossary2.jpeg
Transcript.png
  • AG: Agility
  • AP: Action Points
  • Caps: Bottlecaps
  • CH: Charisma
  • CND: Condition
  • DR: Damage Resistance
  • EFF: Effects
  • EN: Endurance
  • HP: Hit Points
  • HR: Healing Rate
  • IN: Intelligence
  • LU: Luck
  • LVL: Level
  • PE: Perception
  • RAD: Radiation
  • RADS: Your Accumulated Radiation
  • Rad Poison: Radiation Poisoning
  • Rad Resist: Radiation Resistance
  • ST: Strength
  • VAL: Value
  • WG: Weight
  • XP: Experience Points

Hacking

Information Image Text #
Hacking

HelpHacking
0000017B
FNVHackingHelp.jpg
Transcript.png

Some terminals are protected, and can't be accessed without a password. If your Science skill is high enough, you can attempt to hack the terminal.

Selecting the correct password will grant you access. If your guess is incorrect, you will be shown how many letters match the correct password, and in the correct location.

You have 4 tries to guess correctly. If you fail, the terminal will remain inaccessible until you own the password. You can exit hacking at any time and try again. However, exiting the terminal will force its security to reset, delaying your ability to start hacking again.

Hardcore Mode

Information Image Text #
Hardcore Mode

VCG01CasualHardcoreMessage
0011E661
FNV Hardcore Mode message box.jpg
Transcript.png

Fallout: New Vegas allows you to play in a new Hardcore Mode that greatly increases the challenge of the game. In this mode, Stimpaks heal over time and cannot mend broken limbs, Rad-Away removes radiation over time, ammunition has weight, and dehydration is a constant concern. This mode is only recommended for advanced players.

You may turn Hardcore Mode on or off at any time in the Gameplay menu, but if you activate Hardcore Mode now and maintain it through the end of the main storyline, you will receive a special reward. Would you like to activate Hardcore Mode?

Hardcore Mode

HelpHardcoreNeeds
00000190
FNVHCNeeds1.jpg


FNVHCNeeds2.jpg
Transcript.png

Welcome to Hardcore Mode! There are three basic needs that Hardcore Mode requires you to monitor: dehydration (H2O), starvation (FOD), and sleep deprivation (SLP). Each of these needs must be monitored and kept in check or you will suffer penalties and, in extreme cases, death.

Your needs are continually ticking away and can be monitored on the Status screen of your Pip-Boy. When you start to suffer ill-effects from neglected needs, your HUD will display the corresponding code for that need. Be aware that waiting, sleeping, and Fast Travel will also affect your needs. If performing any of these activities would result in death, you will be prevented from doing so.

  • Dehydration (H20) - Dehydration increases at a faster pace than starvation or sleep deprivation. It can be relieved by drinking water or eating certain types of food. Some drinks, such as alcohol and soda, can increase dehydration, so be careful!


  • Starvation (FOD) - The onset of starvation is slower than dehydration, but quicker than sleep deprivation. It can be relieved by eating food.


  • Sleep Deprivation (SLP) - Sleep deprivation is the most low-maintenance of the basic needs. Though a few chems and drinks can help offset sleep deprivation, nothing beats sleep itself.

Healing

Information Image Text #
Healing

HelpPipBoyStats
00000181
FNVHealingHelp.jpg
Transcript.png

When you are hurt, there are several ways to restore your health:

  • Visit a doctor and pay for healing.
  • Use a Stimpak.
  • Eat food or drink water.
  • Sleep in a bed.
Healing Limbs

HelpHealingLimbs
00072358
FNVHealingLimbsHelp2.jpg
Transcript.png

In order to heal a crippled limb, you have three choices: sleep in a bed, find a doctor, or use a Stimpak to heal yourself. In Hardcore Mode, you may only heal crippled limbs by using Doctor's Bags or by visiting a doctor for medical care.


Stimpaks can be used for general healing (which will also slightly heal crippling damage), or they can be applied directly to a limb to heal crippling damage.


To heal a crippled limb directly using a Stimpak, navigate to the Stats screen in your Pip-Boy, then left-click on a limb to use a Stimpak on that limb.

Healing Limbs (Xbox)

HelpHealingLimbsXBox
00072359
HelpHealingLimbsXbox1.jpg

HelpHealingLimbsXbox1.jpg
Transcript.png

In order to heal a crippled limb, you have three choices: sleep in a bed, find a doctor, or use a Stimpak to heal yourself. In Hardcore Mode, you may only heal crippled limbs by using Doctor's Bags or by visiting a doctor for medical care.


Stimpaks can be used for general healing (which will also slightly heal crippling damage), or they can be applied directly to a limb to heal crippling damage.


To heal a crippled limb directly using a Stimpak, navigate to the Stats screen in your Pip-Boy, then press &sXBXBtn; to switch to Limb mode. Now you can use &sXBLStick; to select a limb, and &sXBABtn; to use a Stimpak on the selected limb.


In Hardcore Mode, you may only heal crippled limbs by using Doctor's Bags or by visiting a doctor for medical care.

Hotkeys

Information Image Text #
Hotkeys

HelpHotkeys
0007234C
FNVHotkeysHelp.jpg
Transcript.png

You can hotkey inventory items and then use or equip them without accessing your Pip-Boy.

To hotkey an item, hold a number key (1-8) and then left-click on an item in your Pip-Boy.

Now when the Pip-Boy is closed, you can use or equip that item simply by pressing the corresponding number key. Holding down any number key will display all of your current hotkey assignments.

Hotkeys (Xbox)

HelpHotkeysXBox
000734EE
HelpHotkeysXbox.jpg
Transcript.png

You can hotkey inventory items and then use or equip them without accessing your Pip-Boy.

To hotkey an item in your Pip-Boy, hold &sXBRBumper; and use the &sXBDPad; to select a hotkey slot.

Now when the Pip-Boy is closed, you can use or equip that item simply by pressing the corresponding &sXBDPad;. Holding down the &sXBDPad; will display all of your current hotkey assignments.

Karma

Information Image Text #
Karma

HelpKarma
0006B250
FNVKarmaHelp.jpg
Transcript.png

Karma is an overall indication of your sense of good, evil... or neutrality. Your Karma starts at Neutral, and changes based on your actions. It can go up to Good or Very Good, or down to Evil or Very Evil. Kind or self-sacrificing acts will net you good Karma. Selfish and malicious acts will earn evil Karma. Sometimes, killing a particularly saintly or terrible enemy will modify your Karma as well.

Though some people in the world react to Karma, most base their opinons off of Reputation. Karma is simply the universe's way of tracking your good and bad deeds in the world.

Leveling

Information Image Text #
Leveling

HelpLeveling
00000178
FNVLevelingHelp.jpg
Transcript.png

When you reach the required number of Experience Points, you will level up automatically, so long as you're not in combat.

Every time you level up, your Health increases, and you gain Skill Points to assign to your skills. You will also gain a new perk every other level.

Lockpicking

Information Image Text #
Lockpicking

HelpLockpicking
0000017C
FNVLockpickingHelp.jpg
Transcript.png

&-sUActnForward;&-sUActnBack;&-sUActnSldleft;&-sUActnSldright;: Apply torque with the screwdriver
Mouse: Rotate the bobby pin
&sKBF;: Force Lock

When torque is applied, the closer the bobby pin is to the correct position, or "sweet spot," the more the lock will rotate before the bobby pin breaks. Only when the bobby pin is in the correct position will the lock rotate fully, and open.

You can also try to open a lock by forcing it, but if you fail the lock will be permanently broken and can only be opened with a key.

Lockpicking (Xbox)

HelpLockpickingXBox
00000184
HelpLockpickingXbox.jpg
Transcript.png

&sXBRStick;: Apply torque with the screwdriver
&sXBLStick;: Rotate the bobby pin
&sXBXBtn;: Force Lock

When torque is applied, the closer the bobby pin is to the correct position, or "sweet spot," the more the lock will rotate before the bobby pin breaks. Only when the bobby pin is in the correct position will the lock rotate fully, and open.

You can also try to open a lock by forcing it, but if you fail the lock will be permanently broken and can only be opened with a key.

Movement and Combat

Information Image Text #
Movement and Combat

HelpGeneral
0006D914
FNVMovementCombatHelp1.jpg

FNVMovementCombatHelp2.jpg
Transcript.png

&-sUActnForward;: Move forward
&-sUActnBack;: Move backward
&-sUActnSldleft;: Strafe left
&-sUActnSldright;: Strafe right
&sDeviceMouse;: Look around

&-sUActnUse;: Attack
&-sUActnBlock;: Aim/Block

&-sUActnActivate;: Activate Objects
&-sUActnRdyitem;: Reload Weapon (Hold to holster)
&-sUActnMenumode;: Pip-Boy 3000
&-sUActnJump;: Jump

&-sUActnRun;: Run (Toggle)
&-sUActnCrouch;: Sneak (Toggle)
&-sUActnGrab;: Grab

&-sUActnTogglepov;: View Switch (Hold to adjust)
&-sUActnVats;: Vault-Tec Assisted Targeting System (Hold to scan)

Movement and Combat (Xbox)

HelpGeneralXBox
000BB215
HelpGeneralXbox.jpg

HelpGeneralXbox2.jpg
Transcript.png

&sXBLStick;: Move around
&sXBRStick;: Look around

&-sUActnUse;: Attack
&-sUActnBlock;: Aim/Block

&-sUActnActivate;: Activate Objects
&-sUActnRdyitem;: Reload Weapon (Hold to holster)
&-sUActnMenumode;: Pip-Boy 3000
&-sUActnJump;: Jump

&-sUActnCrouch;: Sneak (Toggle)
&-sUActnGrab;: Grab

&-sUActnTogglepov;: View Switch (Hold to adjust)
&-sUActnVats;: Vault-Tec Assisted Targeting System (Hold to scan)

Maps

Information Image Text #
Maps

HelpPipBoyData
0006D914
FNVMapsHelp1.jpg

FNVMapsHelp2.jpg
Transcript.png

The Maps are located in your Pip-Boy's Data section.

The Local Map displays an overhead map of your current location, as well as any nearby doors.

The World Map shows an overhead map of the entire Mojave Wasteland area, and markers for any places that have been discovered during the course of your adventures. You can even fast travel directly to any place you have previously visited.

You can zoom the maps in and out, or place (or move, or delete) a custom map marker.

If your active quest has any quest targets, these will be displayed on both the Local and World Maps.

On the World Map, your path to a quest target is indicated by a dotted line. In some cases, you may need to take a route through different areas, and the dotted line will reflect that.

Quests

Information Image Text #
Quests

HelpPipBoyQuest
00072357
FNVQuestsHelp1.jpg

FNVQuestsHelp2.jpg
Transcript.png

The quest screen in your Pip-Boy's Data section tracks your progress in every quest you have undertaken. To the left is a list of quests: those with bright text are active; those with darkened text have been completed or somehow failed. Your active quest is marked by a small box.

On the right-hand side of the screen are the objectives for each quest. The active objectives have bright text and are on the top of the list; the completed or failed objectives have darkened text and are at the bottom of the list. Some objectives are marked as "(Optional)," and their completion is not necessary to successfully finishing the quest.

You can select any quest as the currently "active" one, or immediately view the location of the active quest's current target on the World Map (if the location is known). Quest Targets are show on your compass and maps for the active quest only.

Radiation

Information Image Text #
Radiation

HelpRadiation
0007235B
FNVRadHelp1.jpg

FNVRadHelp2.jpg
Transcript.png

You can be exposed to radiation either directly from the environment, or by ingesting irradiated food or water. A small amount of radiation will not hurt you, but as your accumulated exposure goes up, you will begin to suffer ill effects, including death, eventually.

Radiation Poisoning Effects:

  • 200 rads: -1 EN
  • 400 rads: -2 EN, -1 AG
  • 600 rads: -3 EN, -2 AG, -1 ST
  • 800 rads: -3 EN, -2 AG, -2 ST
  • 1000 rads: Death!


Radiation Poisoning does not wear off, but can be healed by a doctor, or by taking RadAway. You can also protect yourself ahead of time by taking Rad-X, which increases your Radiation Resistance.

Your accumulated radiation exposure is displayed in your Pip-Boy, in the Status section of the Stats tab.

Radio Signals

Information Image Text #
Radio Signals

HelpRadio
0007235C
FNVRadioSignalsHelp.jpg
Transcript.png

All the radio signals you have discovered are listed on the Radio screen in the Data tab of your Pip-Boy. Signals listed in bright text are within range, and can be listened to.

Signals listed in darkened text have been discovered, but you are no longer within range -- in order to listen to one of these stations, you have to move back into the signal's receiving range.

Recipe

Information Image Text #
Crafting

HelpRecipe
0000018E
FNVCraftingHelp.jpg
Transcript.png

Three basic types of objects in the world can launch the crafting interface: Campfires, Workbenches, and Reloading Benches. Each station allows the creation of a subset of items. Though many recipes are visible at any time in the game, some recipes will only appear when the player completes a quest or finds a special item. You may also find that certain companions or special locations can open special crafting interfaces for the player.

Recipes have skill and ingredient requirements that must be met to proceed. If any requirement is darkened, that requirement has not been met. Any recipe that has all of its requirements fulfilled will appear fully lit. After using a recipe, the product(s) of the recipe will all immediately be available in your inventory.

Repairing

Information Image Text #
Repairing

HelpRepair
0015E5BC
FNVRepairingHelp.jpg
Transcript.png

Weapons and apparel with low Condition suffer from decreased Damage and Damage Threshold, respectively. There are two primary ways to repair low Condition equipment: self-repair and repair vendors.

  • Self-Repair: In your Pip-Boy, the Repair menu shows any equipment you currently have that can be used to repair the selected piece of equipment. Highlight the piece of equipment you would like to sacrifice to make the repair. The efficiency of your repair is affected by your character's Repair skill.


  • Repair Vendors: Some characters in the world have the ability to repair equipment in exchange for caps. Though they require no special gear to perform the repair, they are limited by their own skill. Extremely talented repair vendors may be able to restore a weapon or piece of apparel to almost perfect condition, but it may be expensive.


Once a weapon is above 75% Condition or piece of apparel is above 50% Condition, it is functioning as well as it can. Repairs made above that Condition are simply maintaining the equipment to keep it at peak performance for a longer period of time.

Reputation

Information Image Text #
Reputation

HelpReputation
0000018F
FNVRepHelp1.jpg


FNVRepHelp2.jpg


FNVRepHelp3.jpg
Transcript.png

You have established a reputation with a group of people in the wasteland! Whether that reputation is good or bad, you're finally somebody, and people associated with that group will start to react to what you've done. There are many different factions in the wasteland, and you can develop a distinct reputation with each one.

As you perform actions that benefit a group, you will gain Fame. If you perform actions that harm a group, you will gain Infamy. Your reputation with any given group is a measure of the combined total of Fame and Infamy that you have earned. The benefits and drawbacks of any given reputation depend on the group itself. You may receive discounts with merchants, provoke attacks from hired thugs, or simply be treated differently.

Though you will initially start out with a Neutral reputation with any given faction, your Fame and Infamy will eventually push your reputation in different directions. You can see all of your current reputations under the General section of your Pip-Boy.

Good Reputations:

  • Smiling Troublemaker - Some good, a little bad.
  • Good Natured Rascal - Good, a little bad.
  • Accepted - Some good.
  • Liked - Definitely good.
  • Idolized - Most good.


Mixed Reputations:

  • Soft-Hearted Devil - More bad than good.
  • Dark Hero - More good than bad.
  • Mixed - Some good, some bad.
  • Unpredictable - Good and bad.
  • Wild Child - Most good, most bad.


Bad Reputations:

  • Sneering Punk - Some bad, a little good.
  • Merciful Thug - Bad, a little good.
  • Shunned - Some bad.
  • Hated - Definitely bad.
  • Vilified - Most bad.

Stealth

Information Image Text #
Stealth

HelpStealth
000ABC5A
FNVStealthHelp1.jpg

FNVStealthHelp2.jpg
Transcript.png

Your stealth state is displayed when you crouch (&-sUActnCrouch;). [HIDDEN] means nobody detects you. [CAUTION] means someone is searching for you. [DANGER] means you have been detected by an enemy.

How stealthy you are is affected by many factors:

  • Sneak skill: Your Sneak skill only helps you when you are crouching. The higher your Sneak skill, the easier it is to remain undetected, steal an item, or pick someone's pocket.


  • Line of sight: An enemy is much less likely to detect you if he can't see you.


  • Light level: You are harder to see in darker areas.


  • Movement: You are hardest to detect when motionless, easiest to detect when running.


  • Apparel weight: Heavier apparel makes more noise when moving.


  • Sound: Most melee weapons make very little noise; bigger guns make a lot of noise.


Attacking while undetected gives you an automatic "sneak" critical.

V.A.T.S.

Information Image Text #
V.A.T.S.

HelpVATS
0000017D
FNVVATSHelp.jpg
Transcript.png

Welcome to the Vault-Tec Assisted Targeting System, or V.A.T.S.

V.A.T.S. displays the chance you will hit, along with the condition of each body part.

&sMouseLeftButton;: Attack your target
&sMouseRightButton;: Cancel an attack
&sKBE;: Accept your actions

Left click on the left or right arrows to switch to a new target.

The number of attacks you can make is limited by your Action Points.

V.A.T.S. Advanced

HelpVATS2
000B5ED1
FNVVATSAdvHelp1.jpg

FNVVATSAdvHelp2.jpg

FNVVATSAdvHelp3.jpg
Transcript.png

The Vault-Tec Assisted Targeting System, or V.A.T.S., allows you to pause the game, assess any combat situation tactically, and target the specific body parts of any enemies onscreen.

Pressing and holding &-sUActnVats; will pause the game and scan the area of targets; arrows to the left and right indicate threats that are currently offscreen.

To zoom in on an enemy, simply select it and release &-sUActnVats;. You are now able to target the individual body parts of that enemy.

The percentage value next to a body part indicates the chance to hit that body part with each shot. The small bar next to the body part indicates its condition; when the condition of a body part is completely reduced, that body part is crippled, and the targeted enemy will suffer the obvious ill effects -- crippling the legs reduces movement speed and any lunging attacks; crippling the arms affects accuracy, etc.

When using a melee weapon or unarmed combat, you will need to be close to have a chance to hit. Both melee and grenades are "full body" attacks, and you cannot specify a specific body part. As you raise your Melee Weapons or Unarmed skill, you will gain the ability to perform special attacks with weapons using those skills.

Every attack on a body part uses up Action Points. Generally, the smaller a weapon, the fewer Action Points are required for every shot. Keep in mind that you're not limited to shooting at just one target -- at any time, you can switch available targets, and attack them as well, so long as you have remaining Action Points.

When you've used up all of your Action Points, and are ready to leave V.A.T.S., press &sKBSpace;.

V.A.T.S. (Xbox)

HelpVATSXBox
00000183
HelpVATSXbox.jpg
Transcript.png

Welcome to the Vault-Tec Assisted Targeting System, or V.A.T.S.

V.A.T.S. displays the chance you will hit, along with the condition of each body part.

&-sUActnUse;: Attack your target
&sXBLStick;: Change body parts
&sXBRStick;: Change targets
&sXBBBtn;: Cancel an attack
&sXBABtn;: Accept your actions

The number of attacks you can make is limited by your Action Points.

V.A.T.S. Advanced (Xbox)

HelpVATS2XBox
0006D913
HelpVATSAdvXbox1.jpg

HelpVATSAdvXbox2.jpg

HelpVATSAdvXbox3.jpg
Transcript.png

The Vault-Tec Assisted Targeting System, or V.A.T.S., allows you to pause the game, assess any combat situation tactically, and target the specific body parts of any enemies onscreen.

Pressing and holding &-sUActnVats; will pause the game and scan the area of targets.

To zoom in on an enemy, simply select it and release &-sUActnVats;. You are now able to target the individual body parts of that enemy.

The percentage value next to a body part indicates the chance to hit that body part with each shot. The small bar next to the body part indicates its condition; when the condition of a body part is completely reduced, that body part is crippled, and the targeted enemy will suffer the obvious ill effects -- crippling the legs reduces movement speed and any lunging attacks; crippling the arms affects accuracy, etc.

When using a melee weapon or unarmed combat, you will need to be close to have a chance to hit. Both melee and grenades are "full body" attacks, and you cannot specify a specific body part. As you raise your Melee Weapons or Unarmed skill, you will gain the ability to perform special attacks with weapons using those skills.

Every attack on a body part uses up Action Points. Generally, the smaller a weapon, the fewer Action Points are required for every shot. Keep in mind that you're not limited to shooting at just one target -- at any time, you can switch available targets, and attack them as well, so long as you have remaining Action Points.

When you've used up all of your Action Points, and are ready to leave V.A.T.S., press &sXBABtn;.

Weapons

Information Image Text #
Weapons

HelpWeapons
0000018A
NVWeaponsHelp1.jpg


NVWeaponsHelp2.jpg
Transcript.png

All weapons fall under a weapon skill category that determines how effective the weapon is: Guns, Energy Weapons, Explosives, Melee Weapons, or Unarmed. Compare the small icon below and to the left of the weapon's icon to the icon shown on the Pip-Boy's skill menu.

  • DAM/DPS: These indicate the base Damage and Damage Per Second, respectively. Weapons with a low DAM have difficulty penetrating armor. If you hit a target's Damage Threshold, switch to a weapon with a higher DAM or use ammo that reduces the target's Damage Threshold (e.g. Armor Piercing).


  • STR and Skill: Many weapons have a Strength and/or skill requirement. If your character does not meet the Strength or skill requirement for the weapon, its aim will wobble (if a firearm) or it will attack more slowly (if a hand-to-hand weapon).


  • CND: A weapon's Condition affects the amount of damage is does. At 75% Condition or higher, a weapon does maximum damage and only needs to be maintained. A weapon with low Condition will do less damage and may jam when reloaded.


  • Repair / Mod: These options take you to the Repair and Mod submenus, where you may repair damaged equipment or attach weapon modifications, respectively.

Miscellaneous

Mother Deathclaw

Information Image Text #


QJDeathclawMotherMessage
000E8810
FNV MessageBox Mother Deathclaw.png
Transcript.png

The mother deathclaw goes berserk at the death of her baby!

Old World Blues

Information Image Text #


X-13 Experimental Stealth Suit Complete
xx00BE8F
Old World Blues Stealth Suit 3.jpg
Transcript.png

You have obtained the Aural Stealth Suit! Not only can it be upgraded through testing in X-13, it also has Med-X and Stimpak reserves for all your pain-dampening needs! (Med-X and Stimpacks not included.)

To place